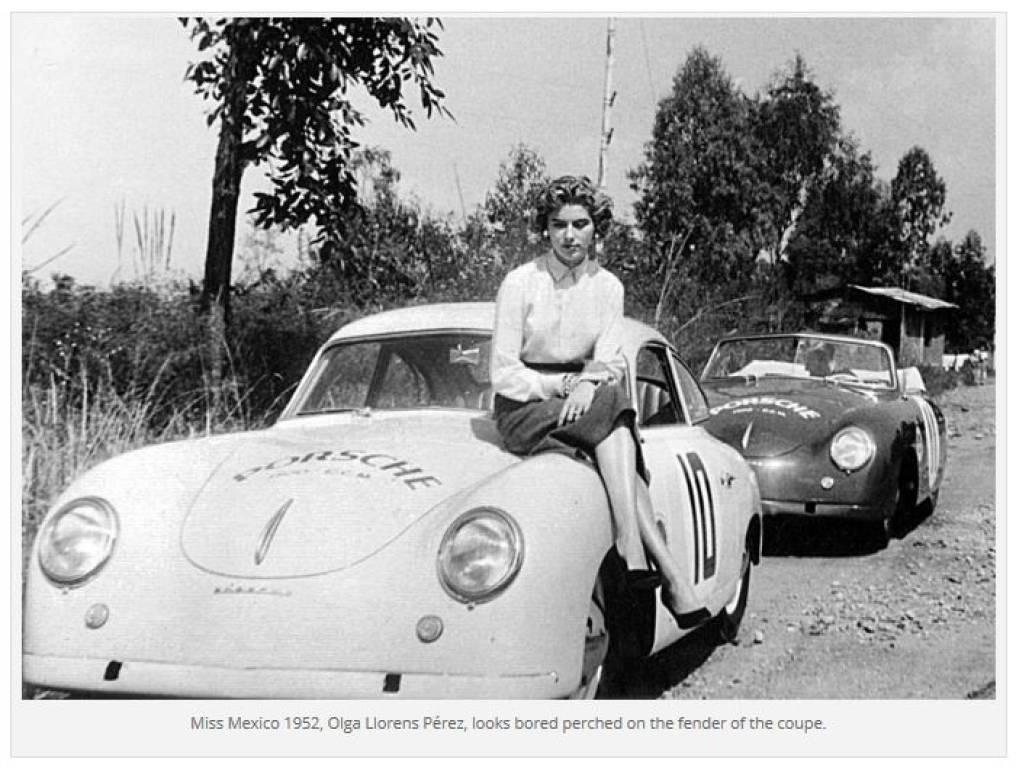
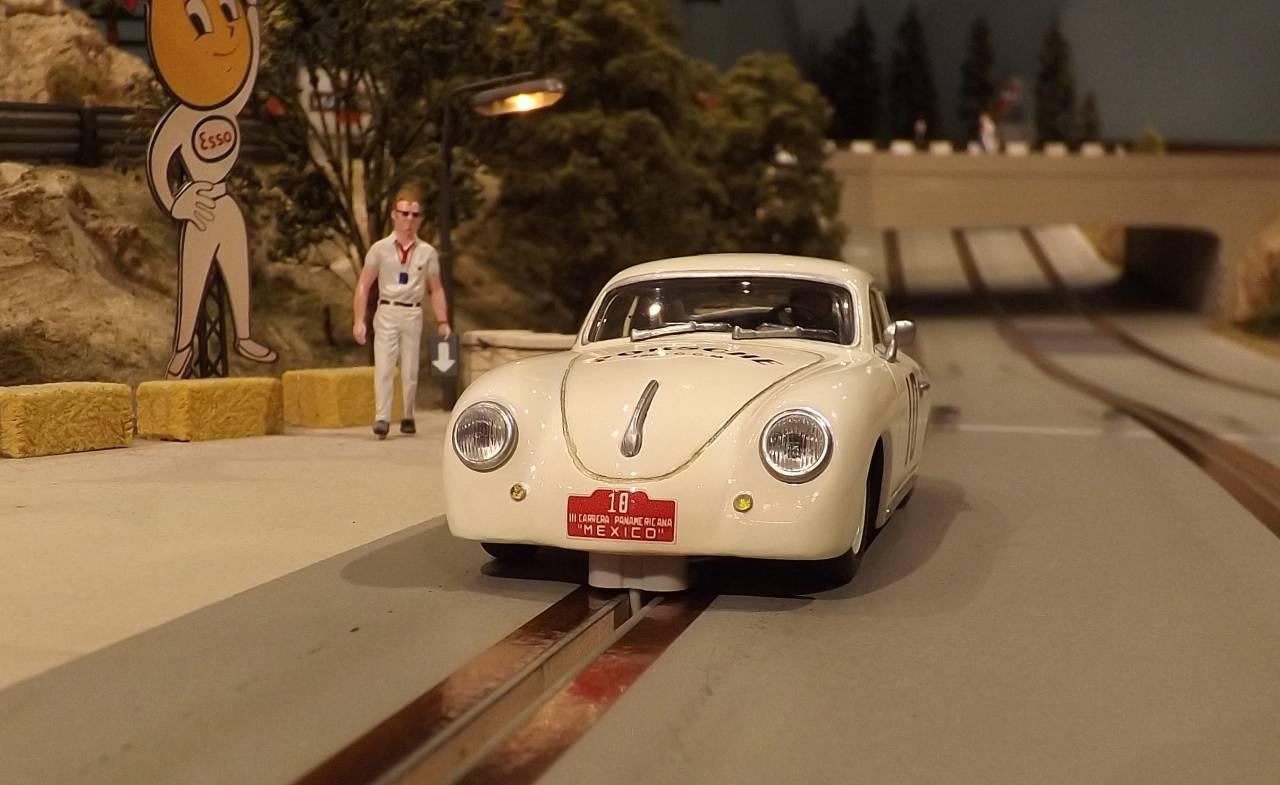
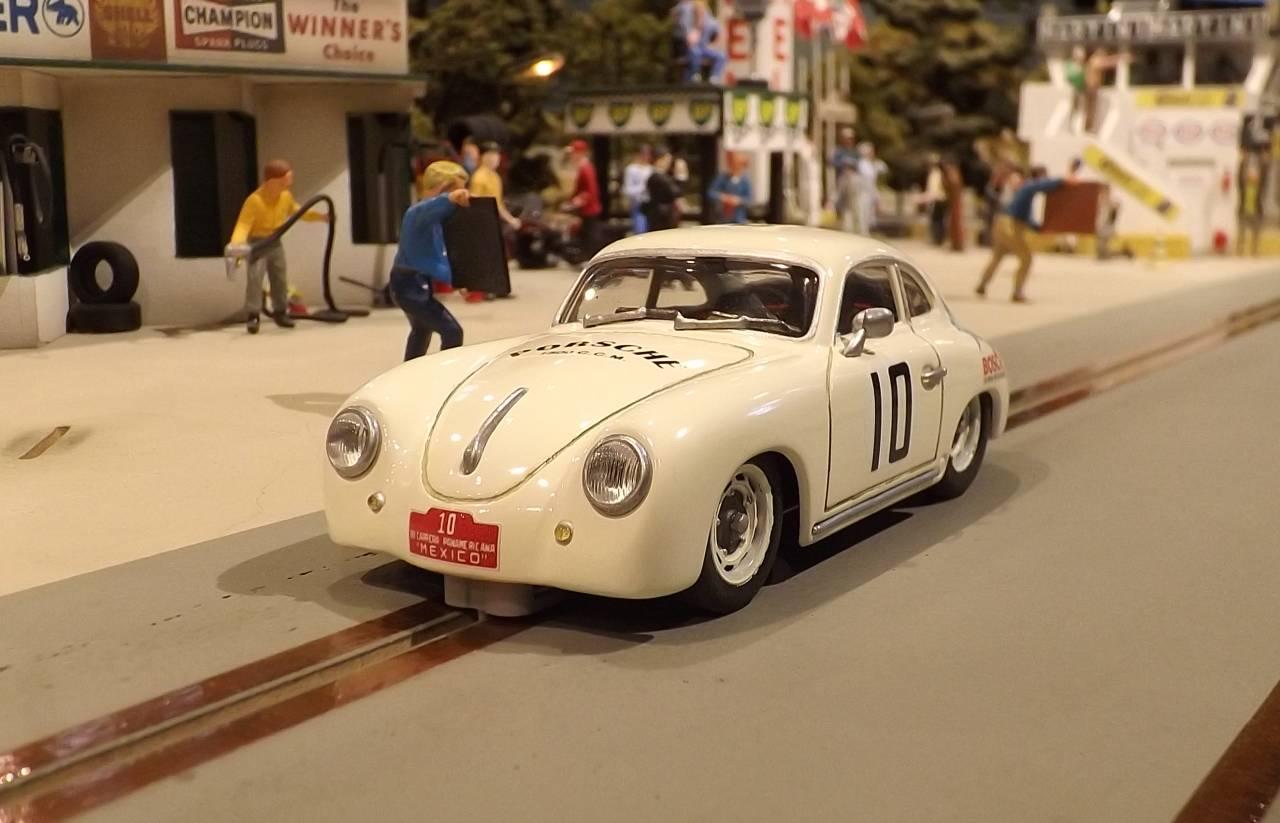
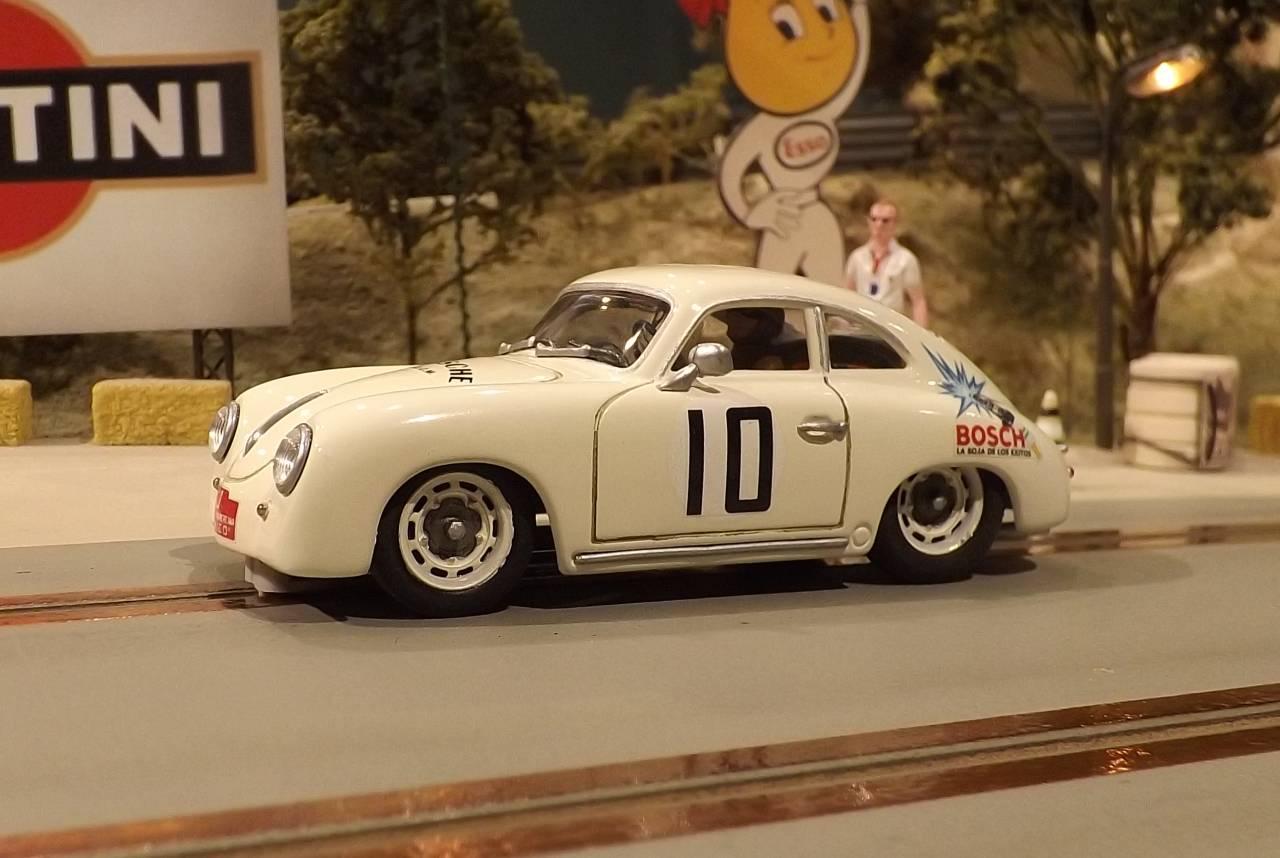
1952 Carrera Panamericana – ‘S’ class – #10 Porsche 356 Super (von Berckheim/Linge/von Hohenlohe) – DNF accident 3rd leg
I forgot about this Carrera Panamericana project which I started last spring. I’ll list the parts and products used which together with a few pictures should at the least supplement my own memory down the road if anything worked particularly well (or not). In each project I try to incorporate lessons learned from my prior mistakes and from the tips of others – but old habits are hard to break. Nevertheless here is what I used and how it went together for better or worse.

It was important to me to that this model had an appropriate stance and was not ‘slammed’. As always I sorted my wheels and tires before starting the chassis. Once I knew the overall diameter of the front and back wheels/tires I set up my jig to shoot for a chassis clearance of approximately 3mm which in most cases will allow for a slightly higher body position and therefore in my opinion a more suitable stance and overall look.
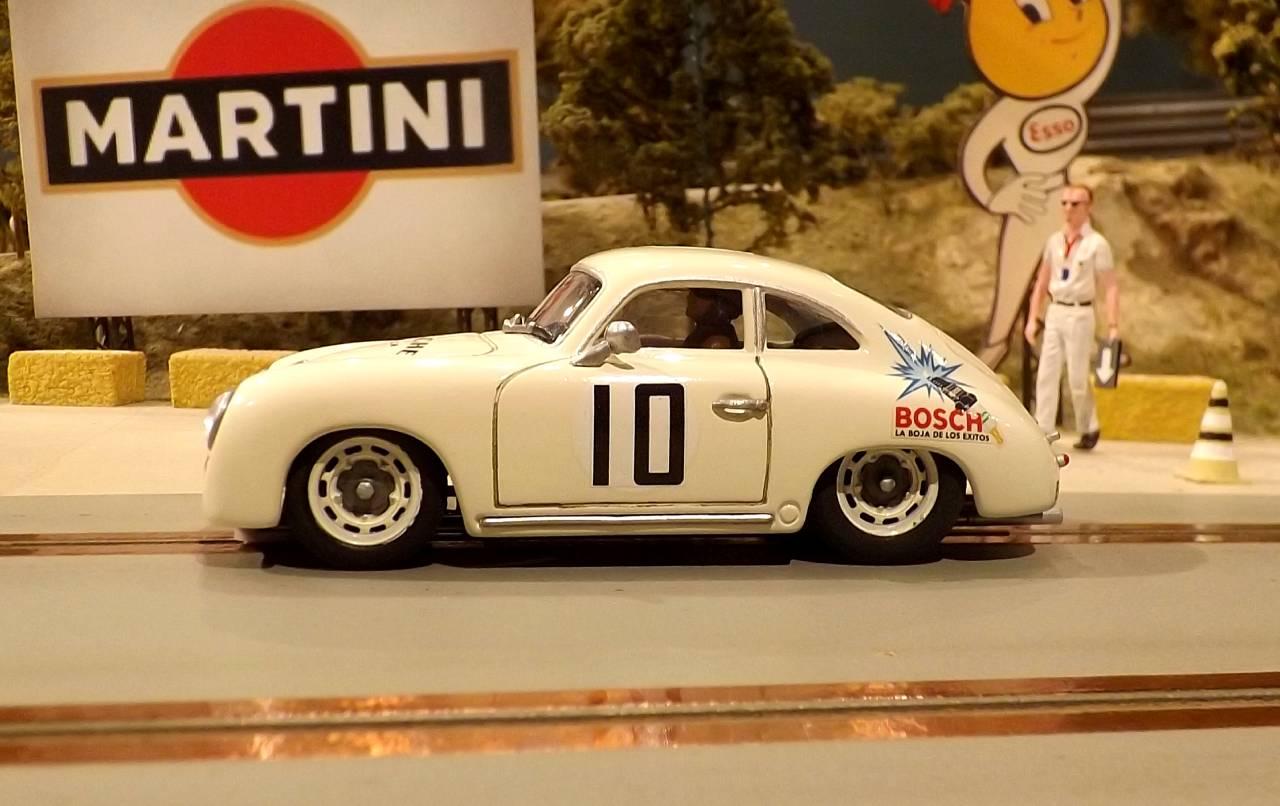
The body was a Ninco classic Porsche 356 with the plate light, tail pipe openings, tear drop tail lamps as well as front turn signal provisions filled in using Tamiya white putty. Everything was primed and painted with Tamiya rattlers – white primer and two coats of Racing White. It isn’t clear to me from the black and white photos what the exact colour was so I did not sweat it and chose one which looked nice. The decals were all created using whatever images I could find and modify from the internet using Microsoft Photodraw and Word then custom printed using my inkjet printer and given two coats of Krylon Crystal Clear (Gloss) to seal them. No clear coat was applied to this body since the paint itself already had a nice gloss finish. On closer inspection some of the areas that I filled with Tamiya putty are still distinguishable but I decided not to spend any more time on the body.
The chromed pieces (ie. mirror, wipers, handles, headlamp bezels, etc.) were all stripped and repainted using Krylon Chrome then dipped in Pledge acrylic floor polish (with a drop of windex added) to seal each piece. Although sealing the chrome dulled it somewhat I opted to seal it for better protection from handling, especially the door handles and rocker trim. The headlamps were dipped in Pledge acrylic before mounting and front and rear signal/tail lights together with reflectors were positioned and fixed in place using Gorilla Glue clear epoxy – as were all of the accent pieces.
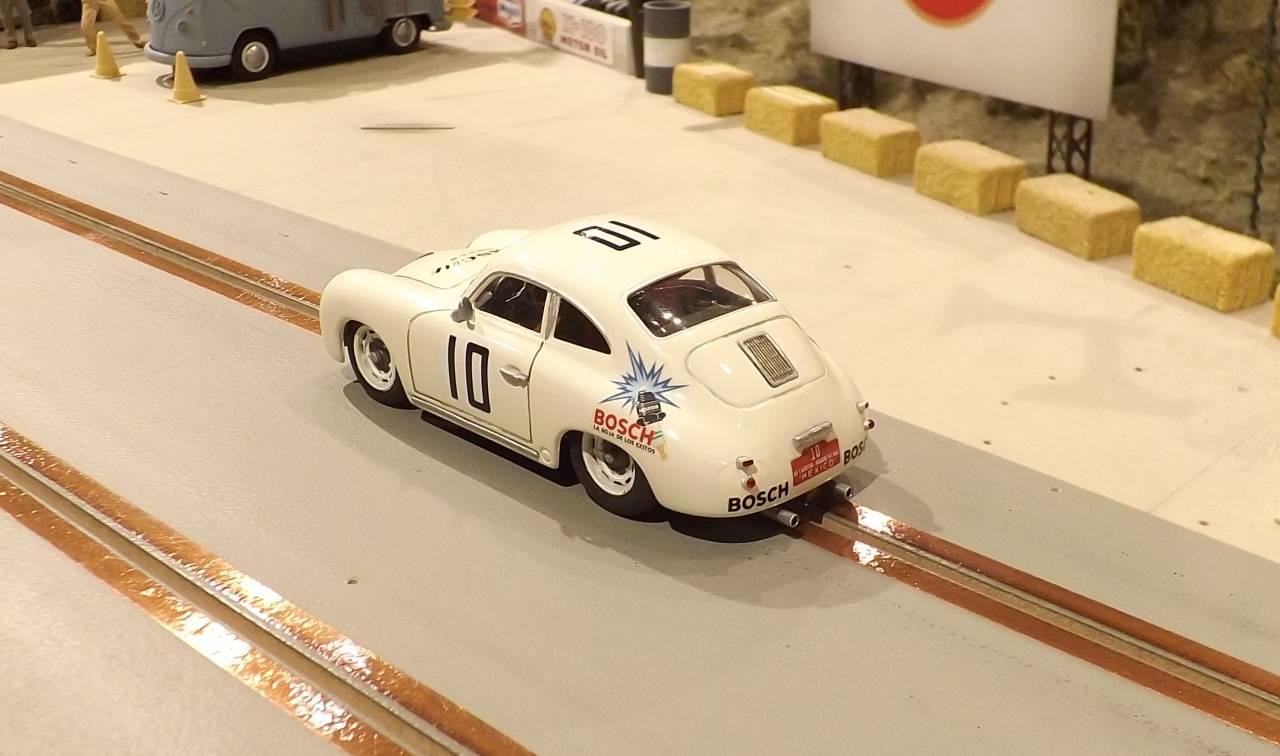
The interior was the very slightly modified Ninco classic Porsche 356 interior but I used a different pilot and upgraded the steering wheel. The interior was painted but remained black with red accents/stripes on the seats and together with the single piece glass secured in place using Gorilla clear epoxy. The completed body and interior weighs in at 24.7 grams which includes a pair of brass body post inserts for 440 screws. I kept things simple and just sleeved the existing body posts using #227 Evergreen styrene tubing although I did add some bracing to the front post.
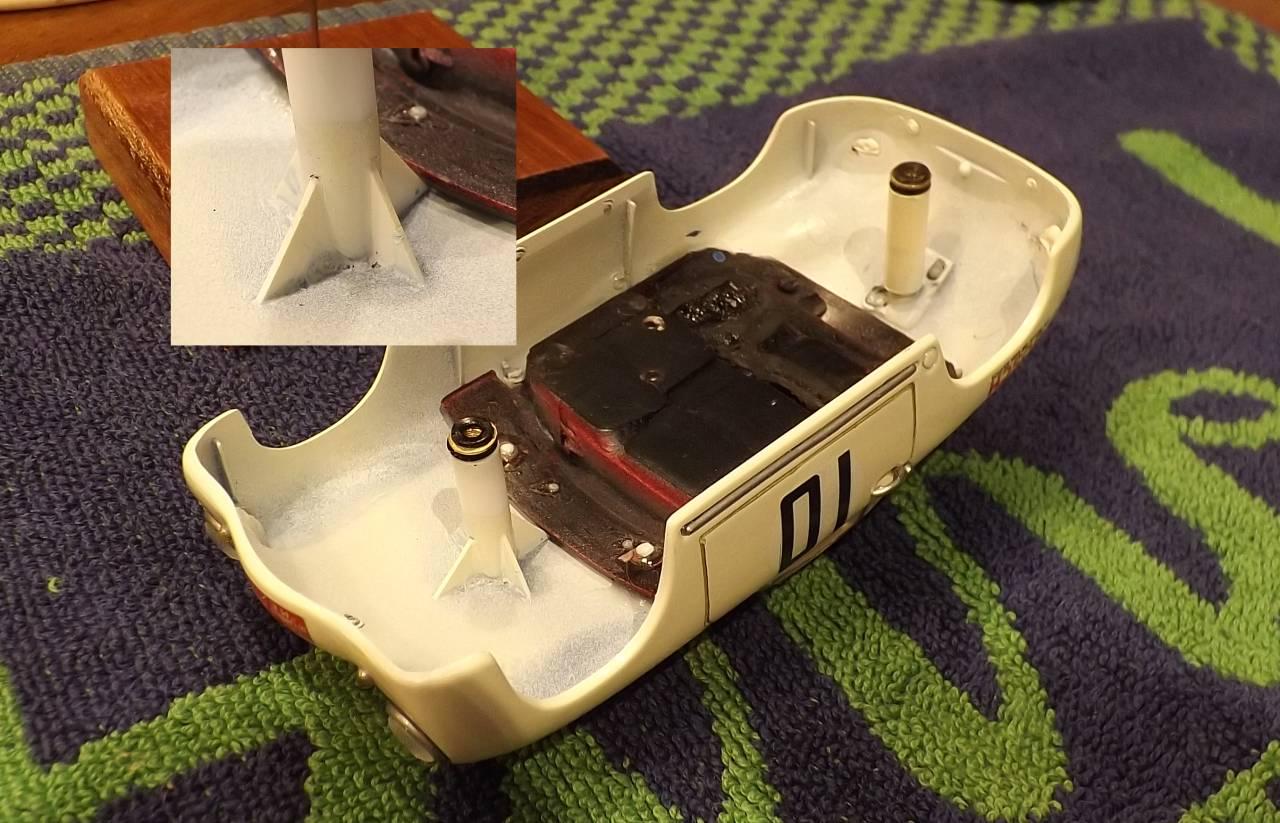
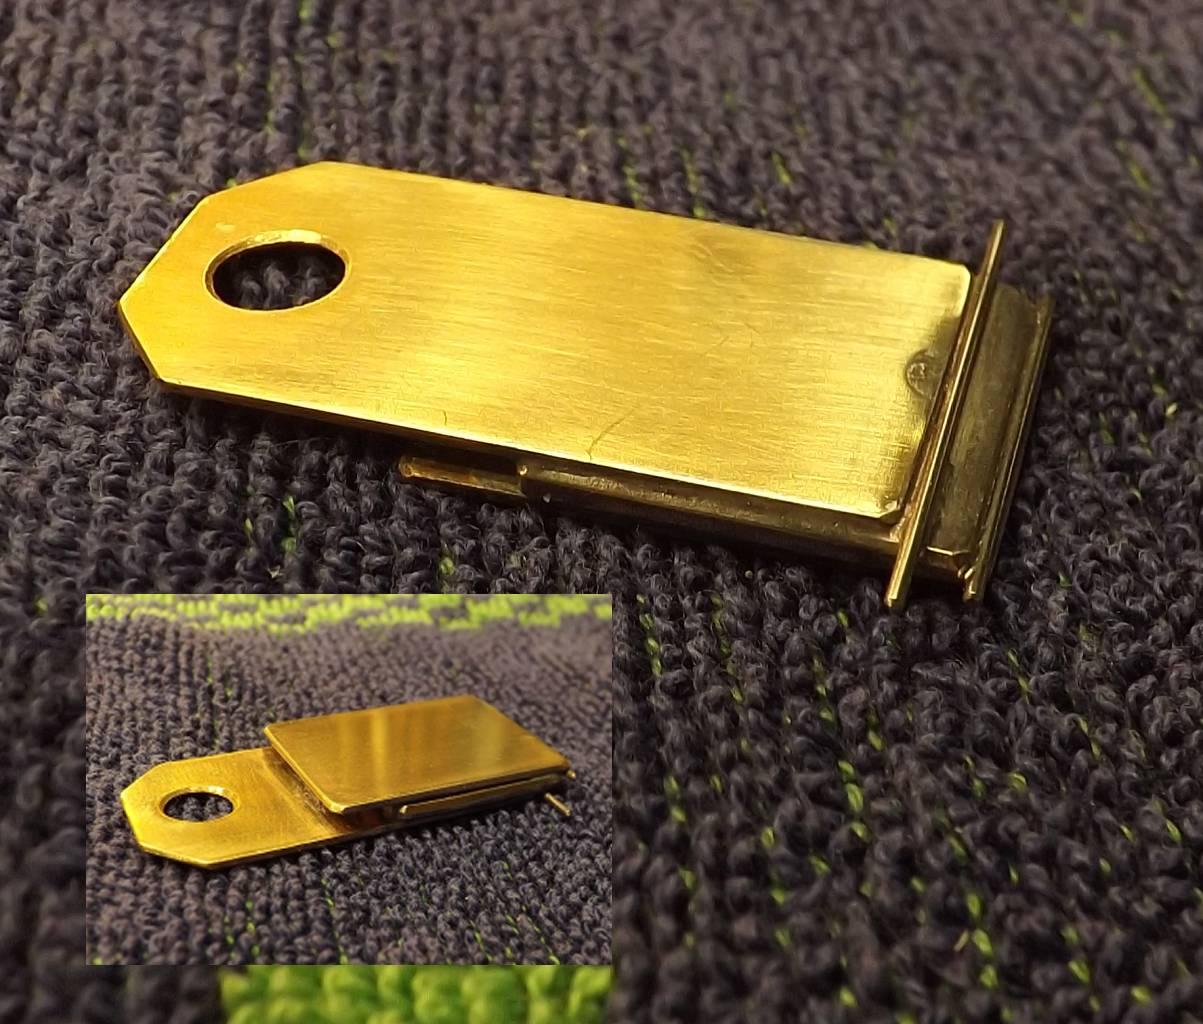
For the chassis I pulled four BW15-200 series wheels which were painted at the same time as the body and mounted DArt SC0118 tires front and back (I used the slightly smaller SC0118F on the front). I opted for a sidewinder setup and decided to go old school and just use brass tubing to hold the front and rear axles. To keep things even simpler I made the Ninco NC1 motor can a part of the chassis and soldered both the front half of the chassis and the rear axle tubing directly to the can. For those concerned about the effect of heat on the motor magnets and plastic endbell it would be possible given how this chassis was constructed to remove the endbell along with the motor guts and solder only the can in place then reinsert everything but since the target motor for this class is a ‘slow’ motor which is not to be opened I left it as is. A plastic repop of the classic Ninco guide was secured using 4mm brass tube soldered to a custom made brass front plate. At the back an additional ‘U’ shaped piece of piano wire would hold both the sliding (front to back) rear body post plate which I made plus the aluminium exhaust pipes. Since this model will need some added weight in the front I fashioned three brass plates plus a couple of .032 wires and soldered them all together to create a rattle pan which can be easily installed (or removed and further tweaked for tuning) to the chassis and which is secured in place by the front body post/screw.
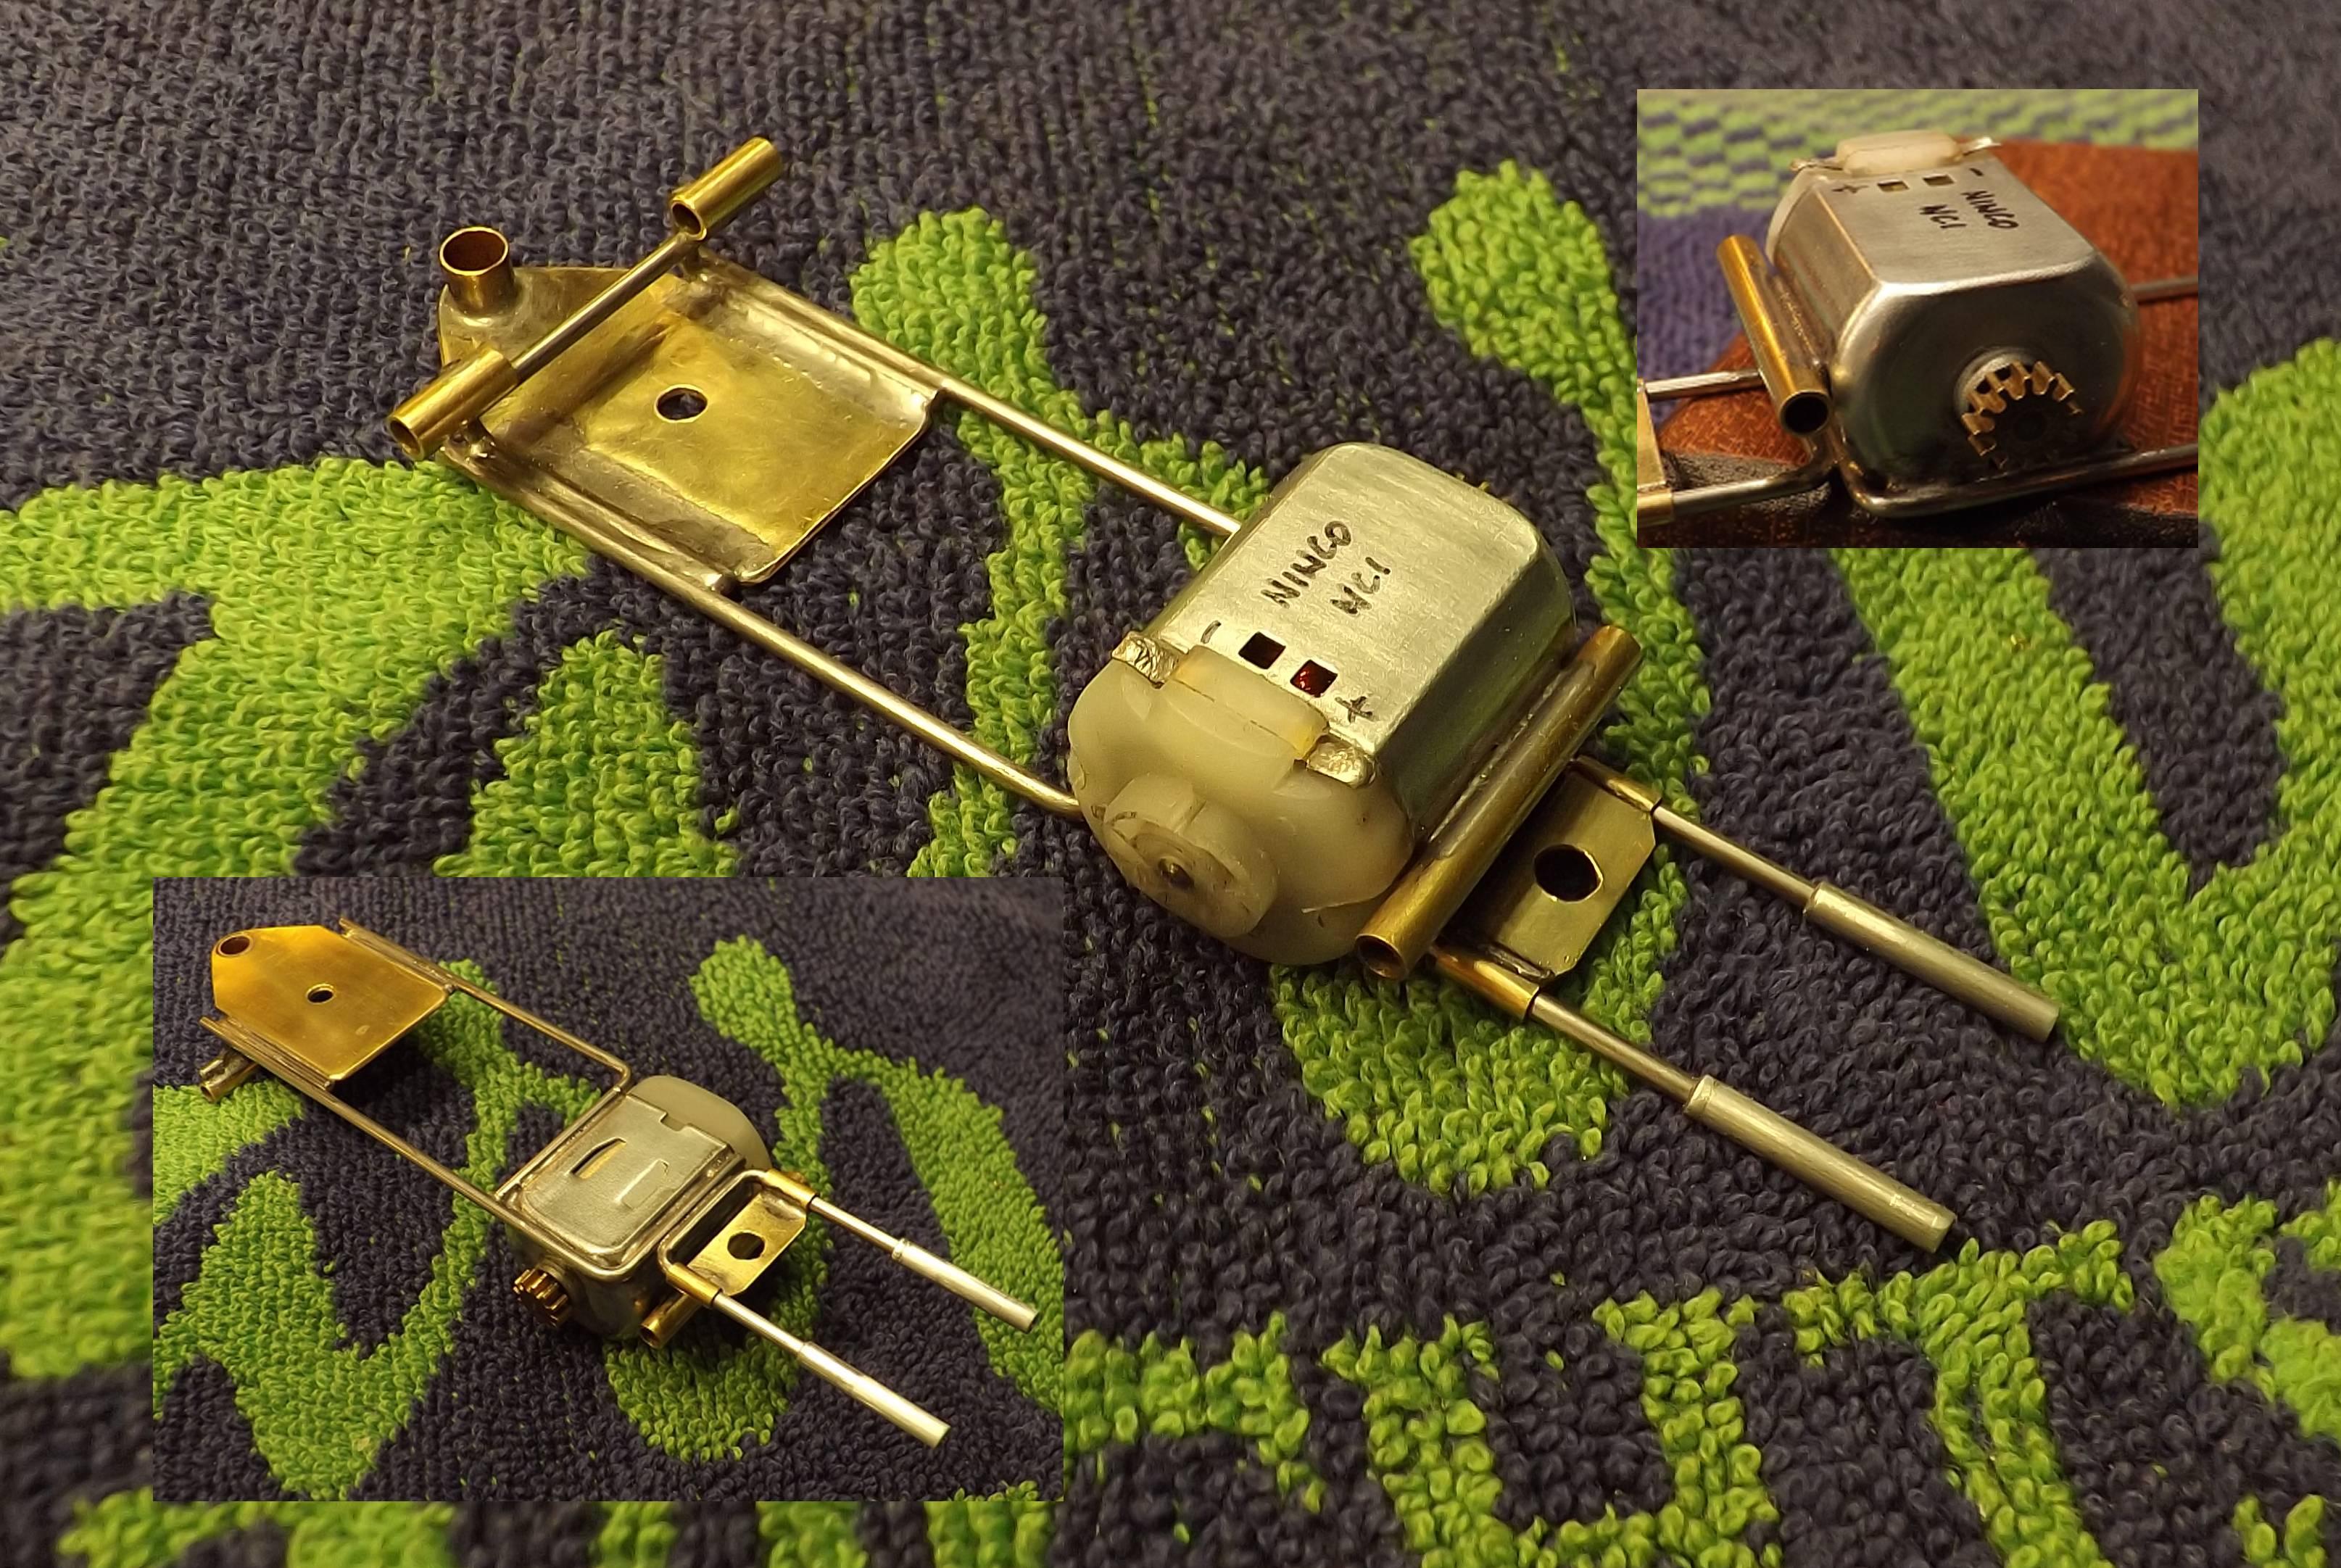
After carefully scrubbing the steel wire and the motor with a water and Ajax mix and then sanding/polishing everything I applied/rubbed a little Brasso metal polish to everything.
For improved cornering a Dubro #2 steel washer was soldered to the solid front axle thereby allowing one wheel to spin free.
As for gearing a test fitting would prove that a Slot.It 6.5mm pinion would mesh adequately with an 18mm Slot.It spur gear. Although the range for this gear set yields potential ratios that are much lower than optimal that is still fine with me. Given the construction of this chassis I can use my pinion puller and press to replace the pinion without unsoldering anything.
After some initial track break-in and testing I opted to drill out approximately 2g of material from the rattle pan. Overall weight of this model is now 81.3 grams. I also changed the pinion to a 13 tooth.
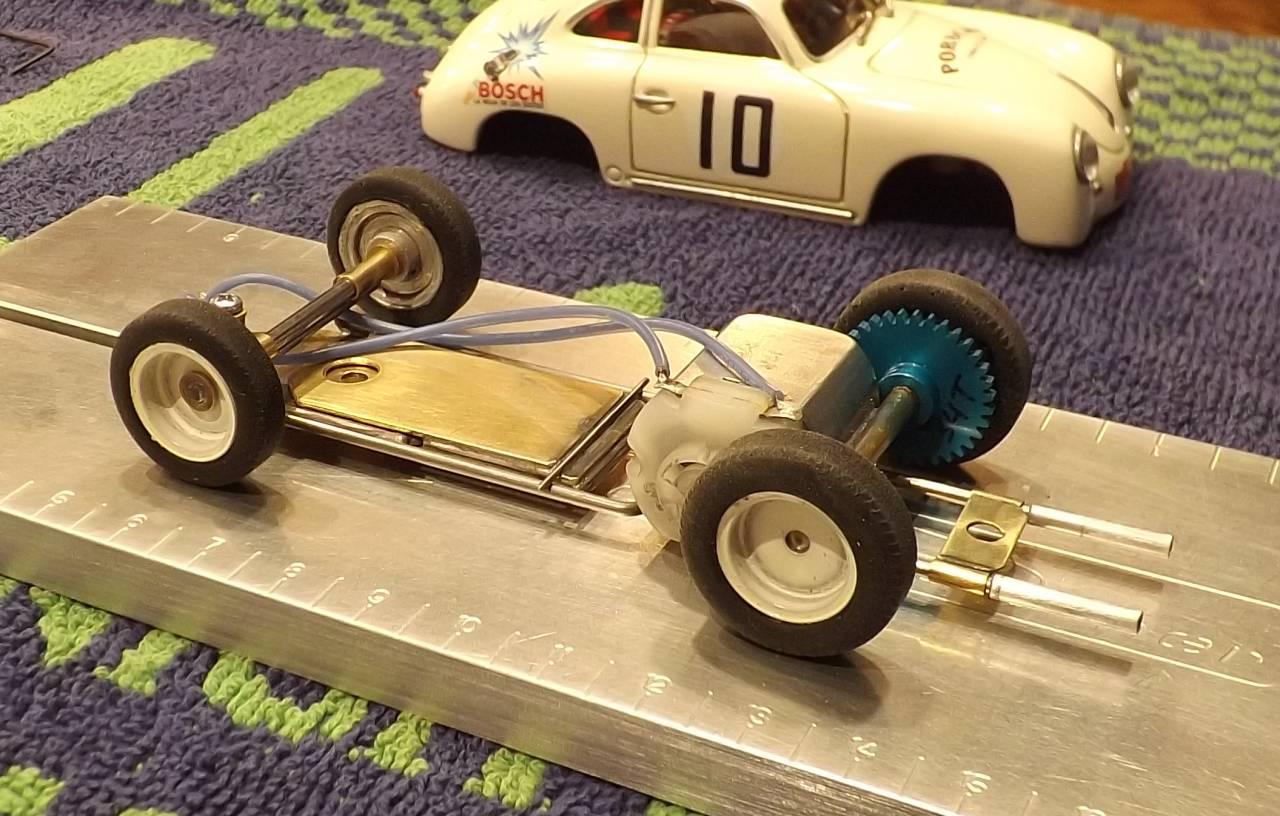
After placing the rattle pan into the chassis I mounted the body. Before securing the body to the chassis with a pair of 440 brass screws I added a little white glue to the insert threads to help prevent the screws from backing out during a race. I also used DArt number 2 urethane washers to space the body from the chassis. Gluing them in place will save some time down the road too. [If you have sufficient clearance you can also add a urethane spacer under each screw head which will also prevent the screws from backing out.]
If your body rolls too much you might need to either remove one or both of the urethane spacers or insert a stop bar. In this case there was no issue with excessive roll.
Now this model is ready! :good:
The Happy Canadian Scale Modeler!
