Not all models are built to race. I recall past models that F1nutz kitbashed including a fire engine and a Team Honda service truck complete with crew – both of which were a pleasure to see on circuit.
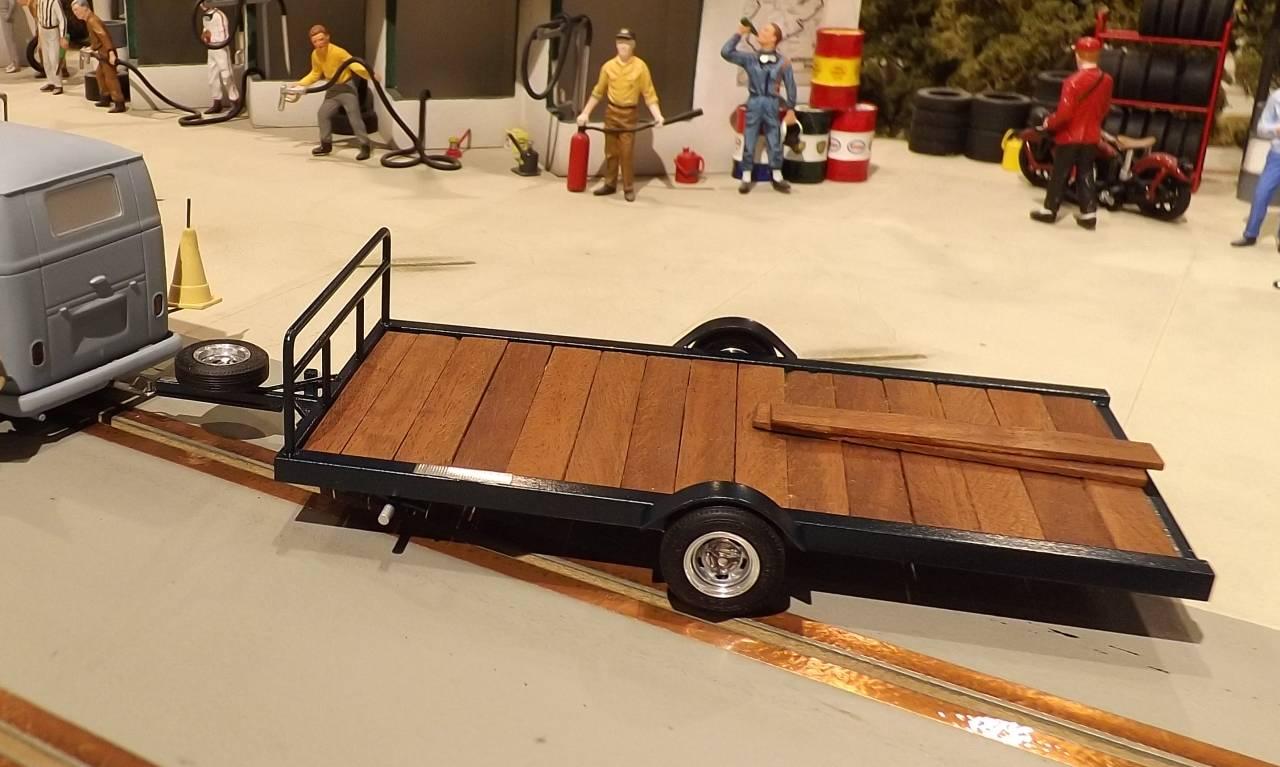
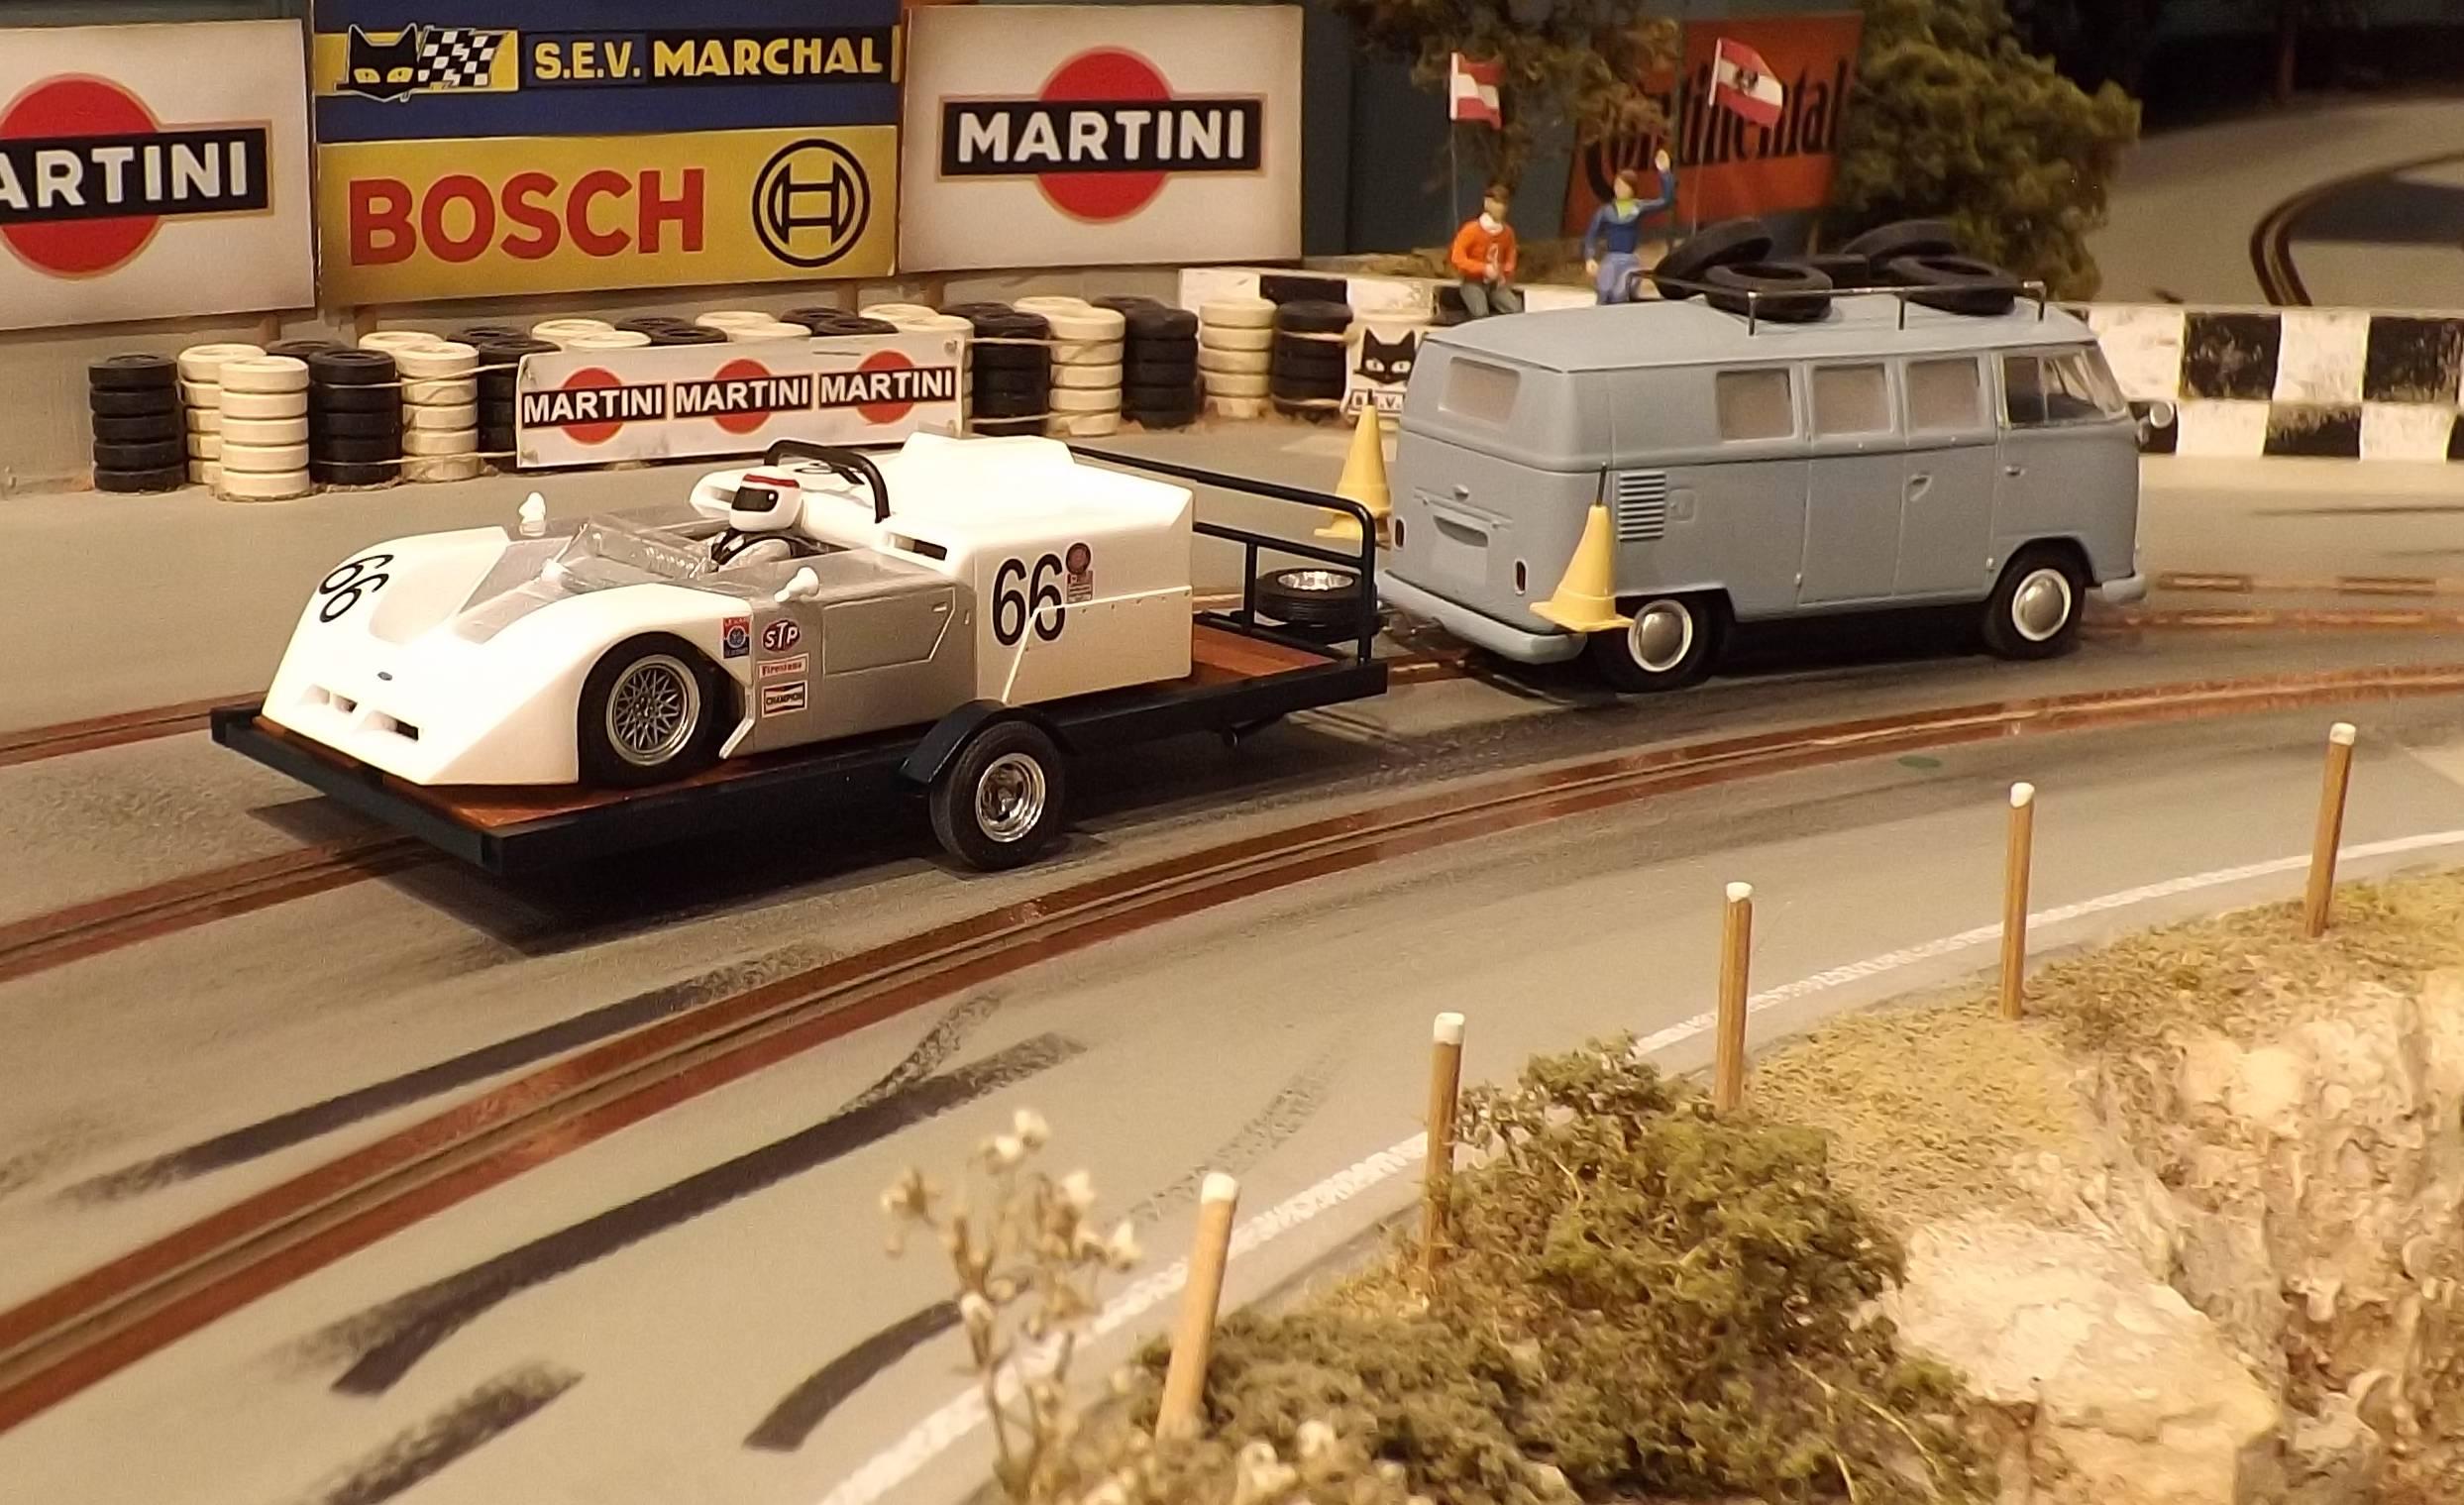
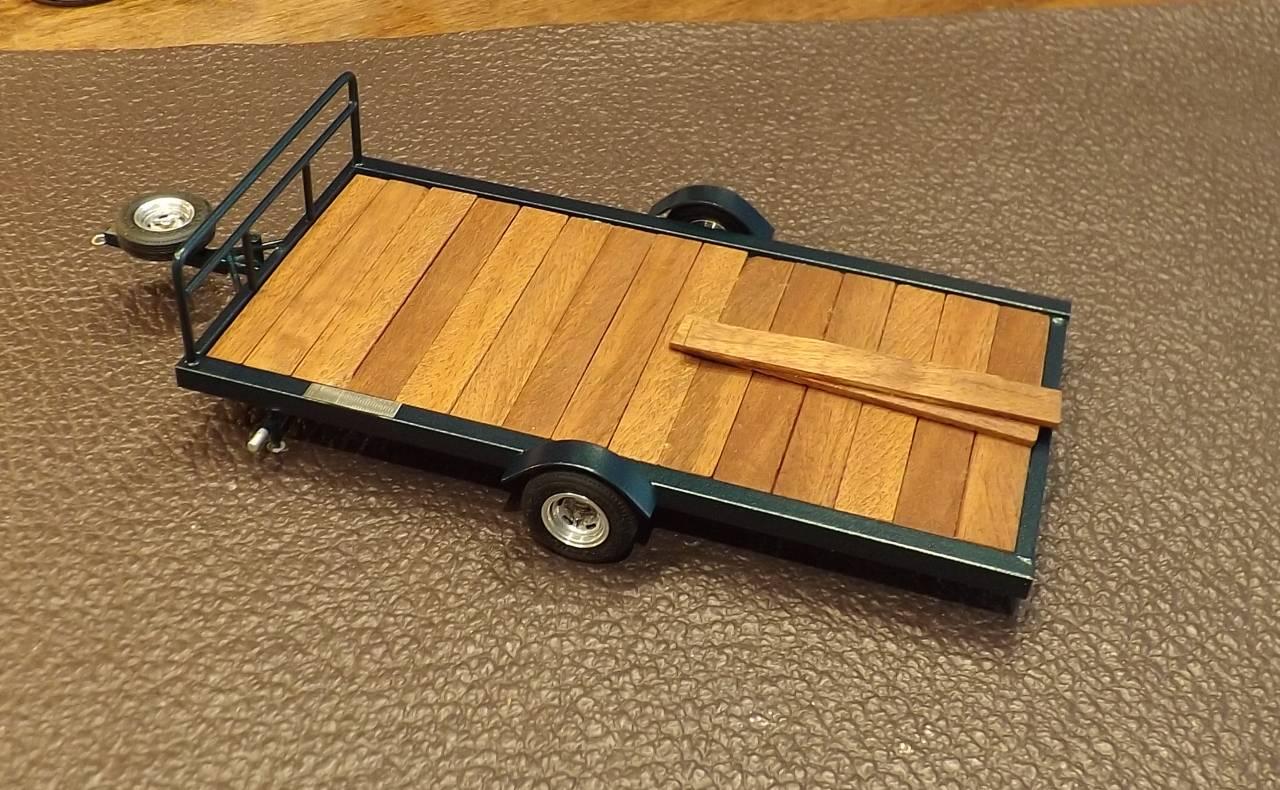
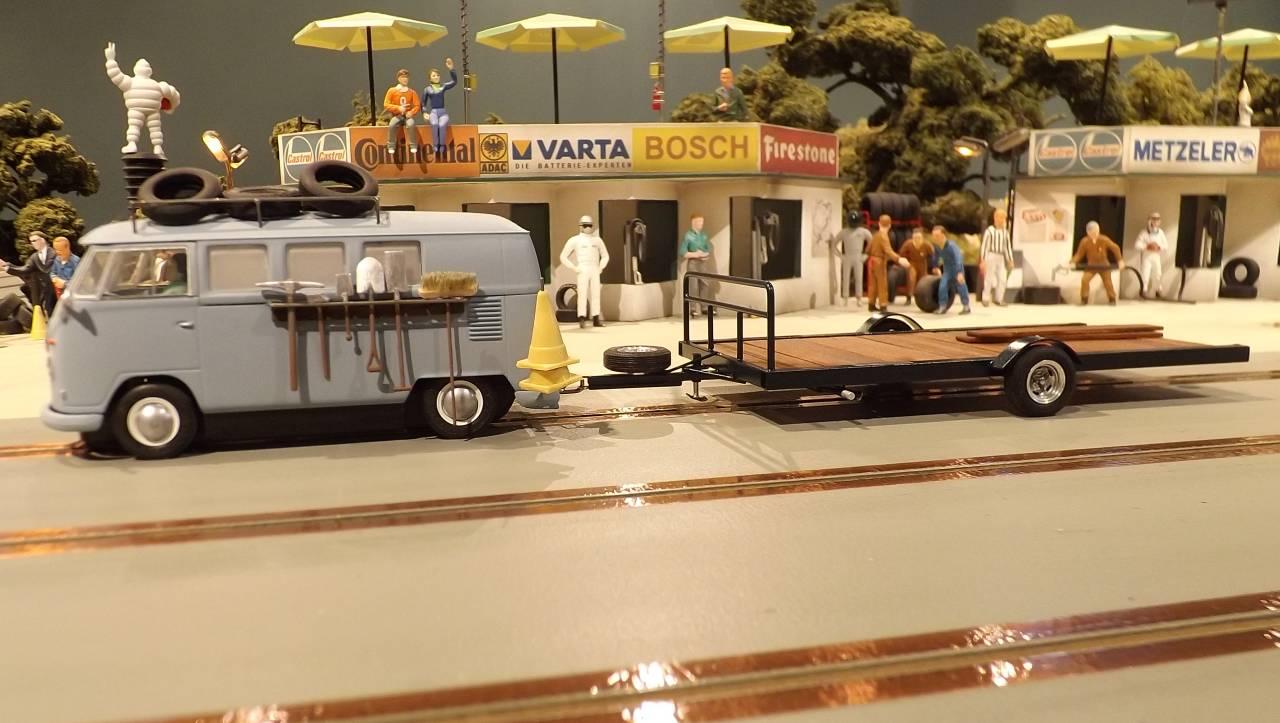
In that spirit I previously kitbashed a VW Track Maintenance Van and those of you who eyed the topic will recall that a trailer hitch was installed and mention was made of creating a trailer sometime down the road. Well we are down that road now and this Utility/Maintenance/Podium/Hauler scratch built trailer is finished. Since I don’t know how many trailers I will ever build this needed to be multi-purpose – so a flat bed would be both the easiest and the most practical – and would be able to lap the circuit with the victor and his car onboard to the cheers of the crowd lining the track post race.
For any of you thinking of making something similar here is what I did. Maybe the pictures and a few details will help.
The Parts
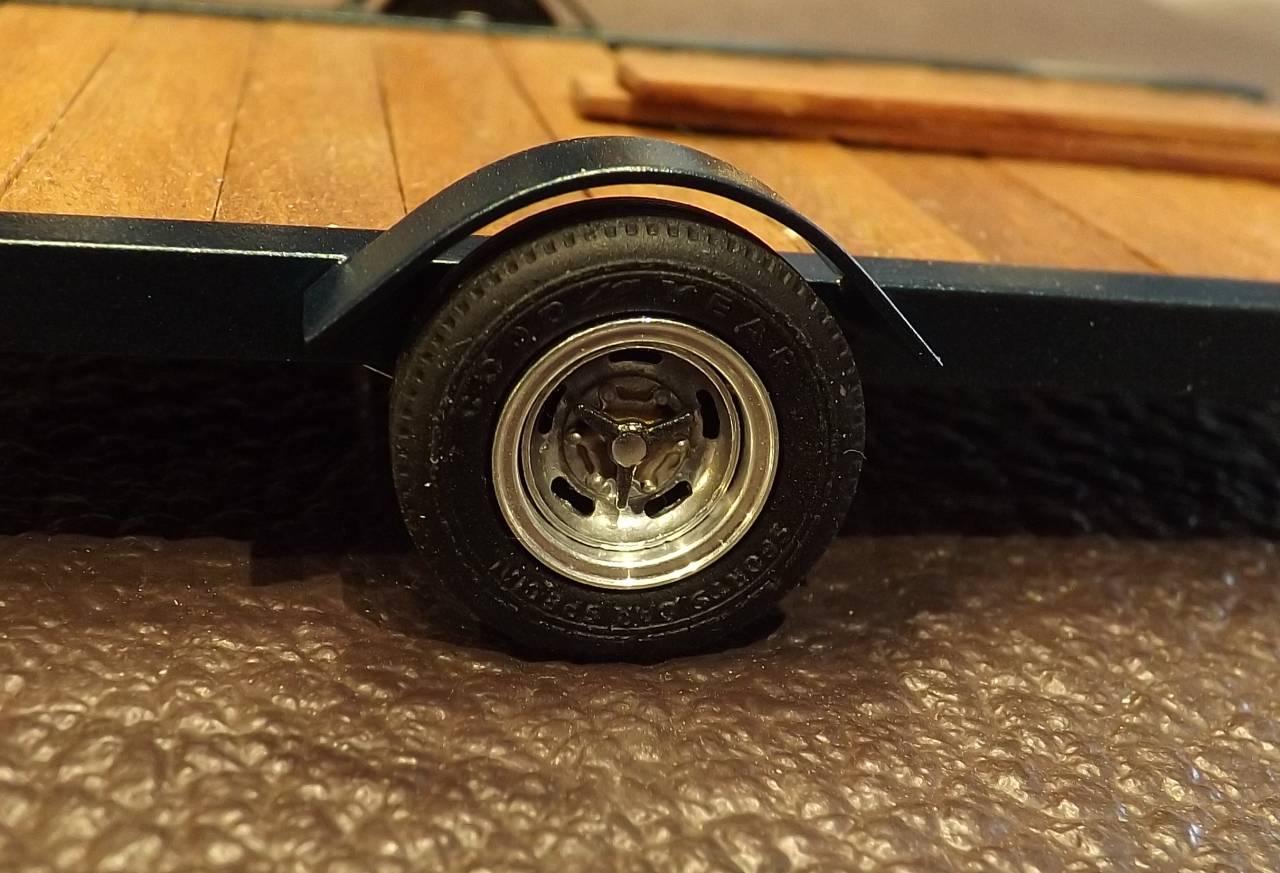
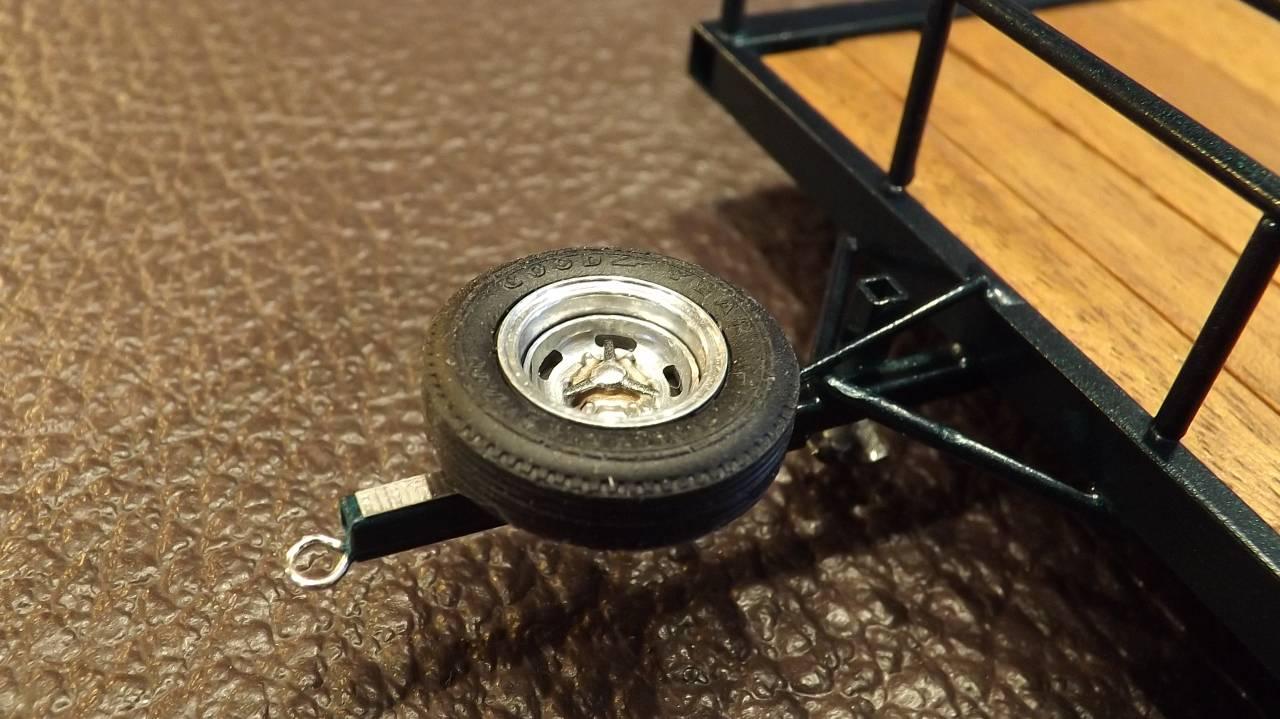
The hitch design was simple and accepts a ring – so part of a dollar store silver coloured earring was perfect – the arm could be fixed easily within a brass tube using 5 minute epoxy. An assortment of K&S brass would be used – including both box and round brass tube stock along with some solid brass wire for the railing at the front. An assortment of K&S piano wire was used to brace the tongue and to make the retractable 5th wheel support assembly. Two BWA 13” 200” width wheels with a 1/16” bore would free spin on a 1/16” brass tube axle each held in place with a pin. Simple. Then 3/32” brass tube would hold the full length of the axle in place underneath the frame. Since the maximum weight will never exceed 200g nor will this model ever be raced the pins inside the brass tube axle should be more than enough to keep the assembly true for smooth operation. Because it will never be raced DArt RM0201 urethane tires were fitted but not trued or glued. 375MIDGET inserts were selected to finish the wheels. A third identical wheel would be prepared and installed as a spare too.
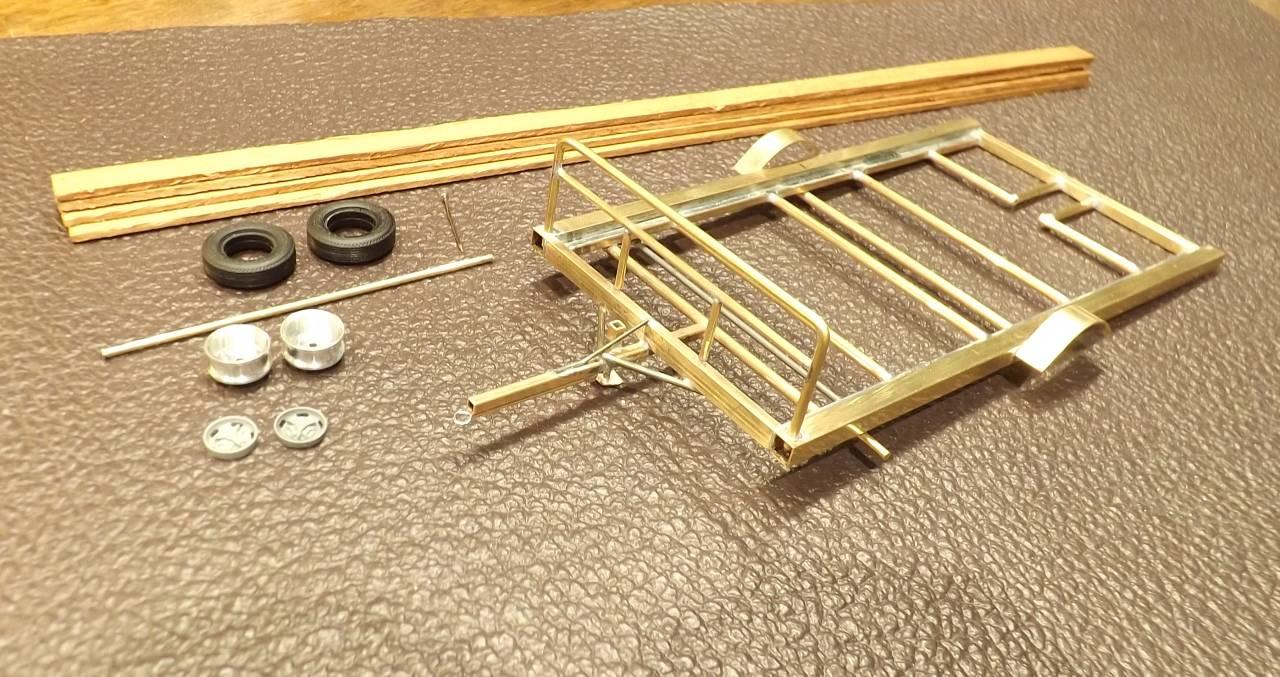
Some 1/16” thick mahagony veneer – cut into boards, sanded and stained – would finish the trailer bed.
The Build
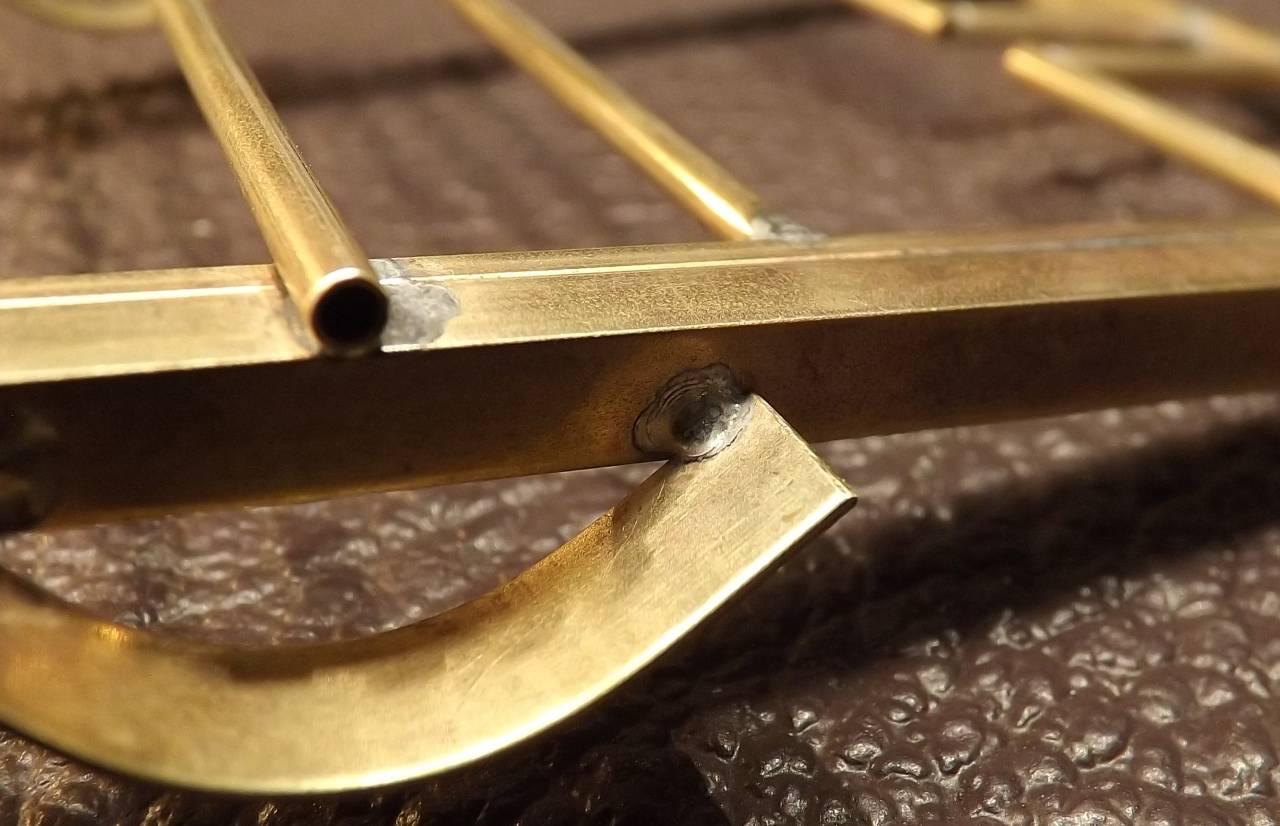
The bed needed to be able to accommodate all sizes of 1/32 scale models including some of the larger CANAM runners therefore I decided on a 15 x 7 ½ cm frame. Since there are some tight corners here at The Ring I opted to build this using a single axle. Both sides and the fore and aft frame pieces were each cut and soldered together making sure that the frame was perfectly flat and square. I used a commercial jig but any flat tile will suffice – just use some graph paper under your work to line up everything. Smaller square brass tube would be soldered to the inside of both lengths to support the planks which would be added later. Similar diameter cross pieces of brass tube were then fitted along the inner width for strength. Since these had to lie underneath the wooden planks they could not be larger in diameter than the inside lengths.
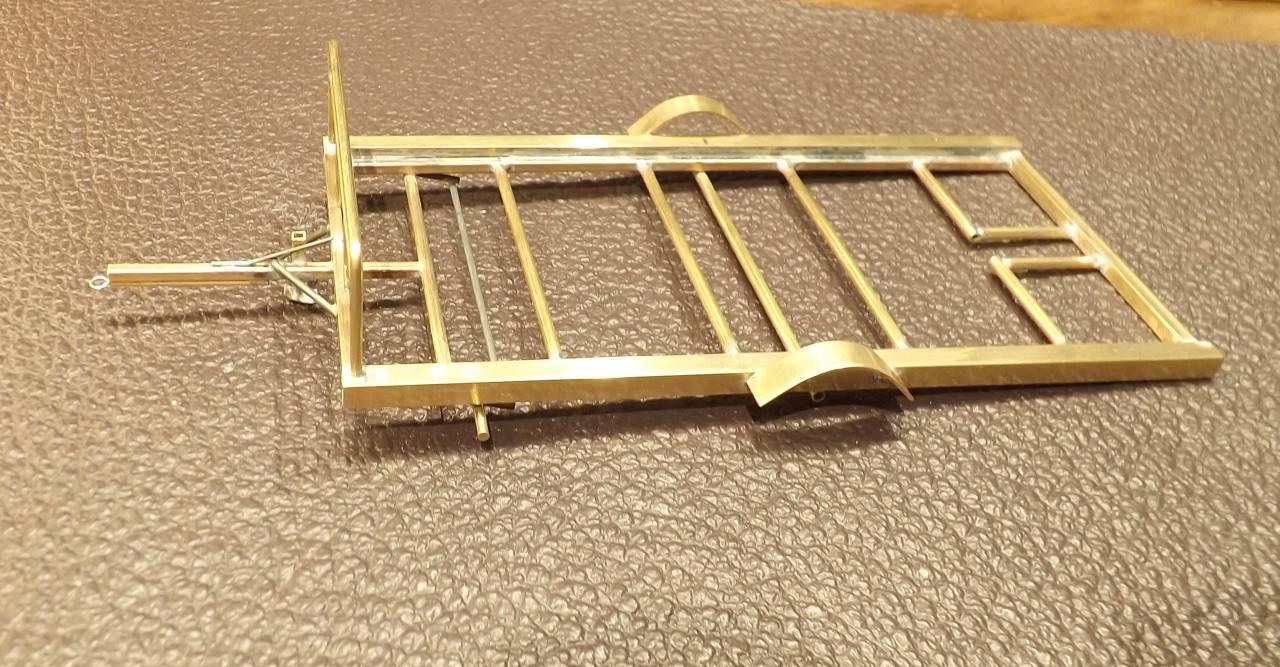
The tongue was soldered to the underside of the frame. Since this was a single axle trailer I made sure to locate the axle slightly aft of the balanced centre of the frame to ensure the weight distribution was tilted slighly to the front. Since I didn’t have all of the trailer detail in place I just tacked the axle tube/sleeve so that if necessary, it could be adjusted after testing. Model placement on the flat bed was also considered to ensure that the trailer would perform properly. This was only necessary since I was fixing the length of the gap to accommodate the guide for any model.
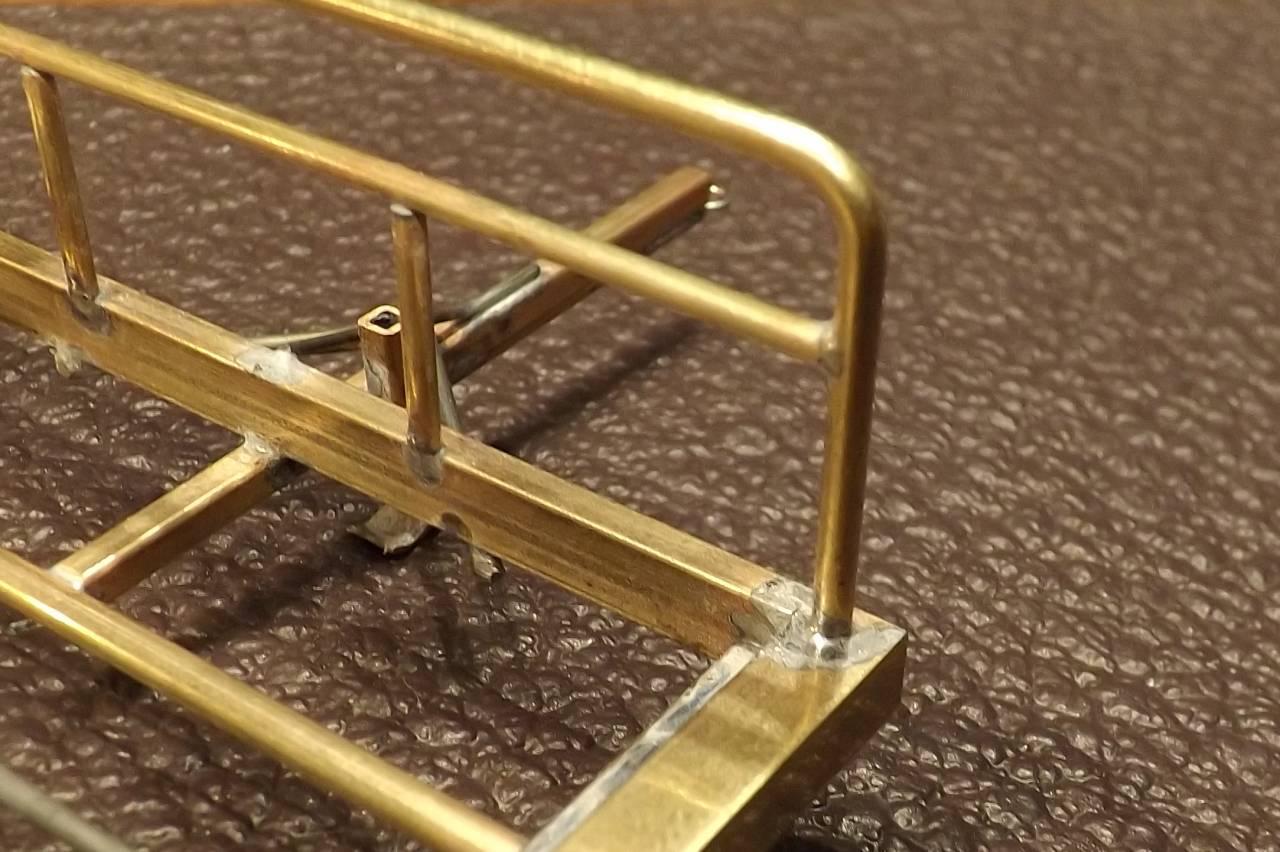
The hand rail was bent and additional rail detail added. This was easy to do using a pin jig while the piece lay flat. Then holes were carefully marked and drilled into the frame at each forward corner to accept the rail side posts. The spindles would simply rest on the frame but also be soldered in place after the sides.
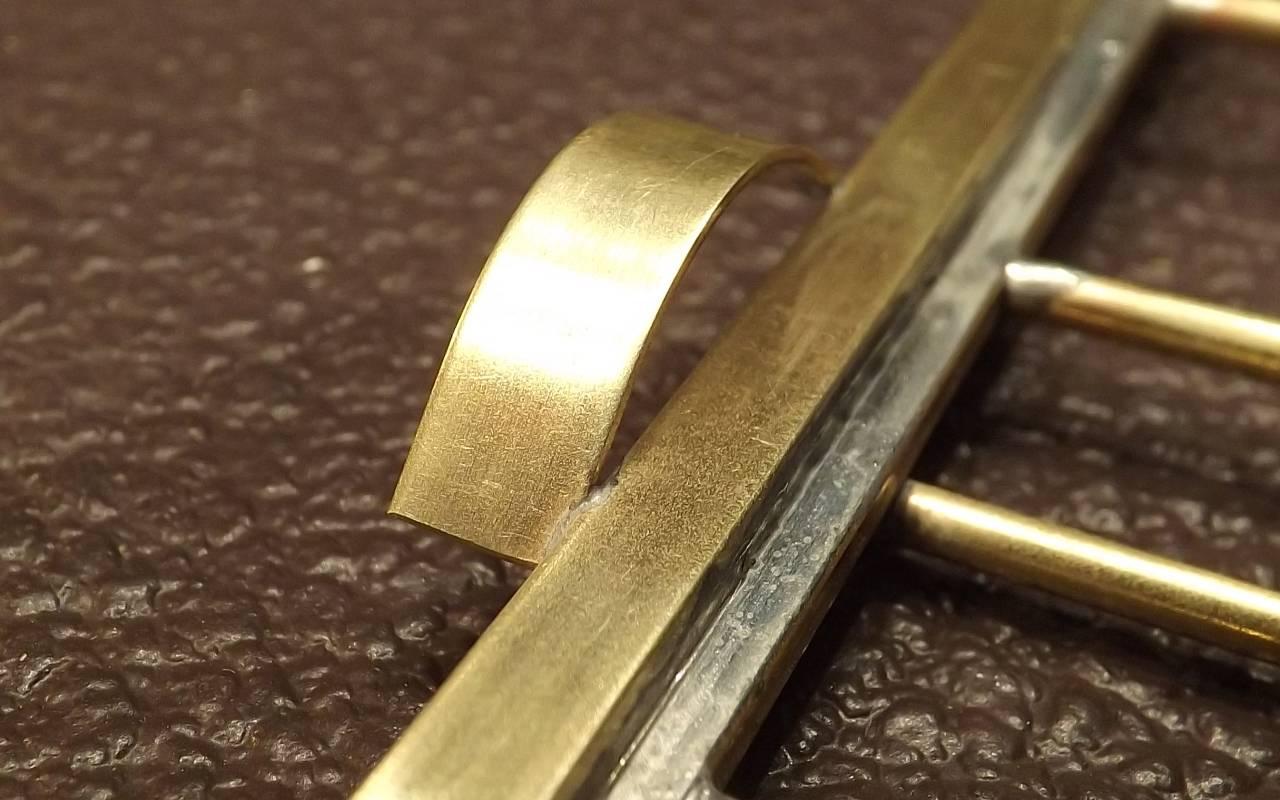
Two narrow flat strips of brass were bent and fashioned into fenders, then tacked into place. I eyeballed their position before tacking them to the frame.
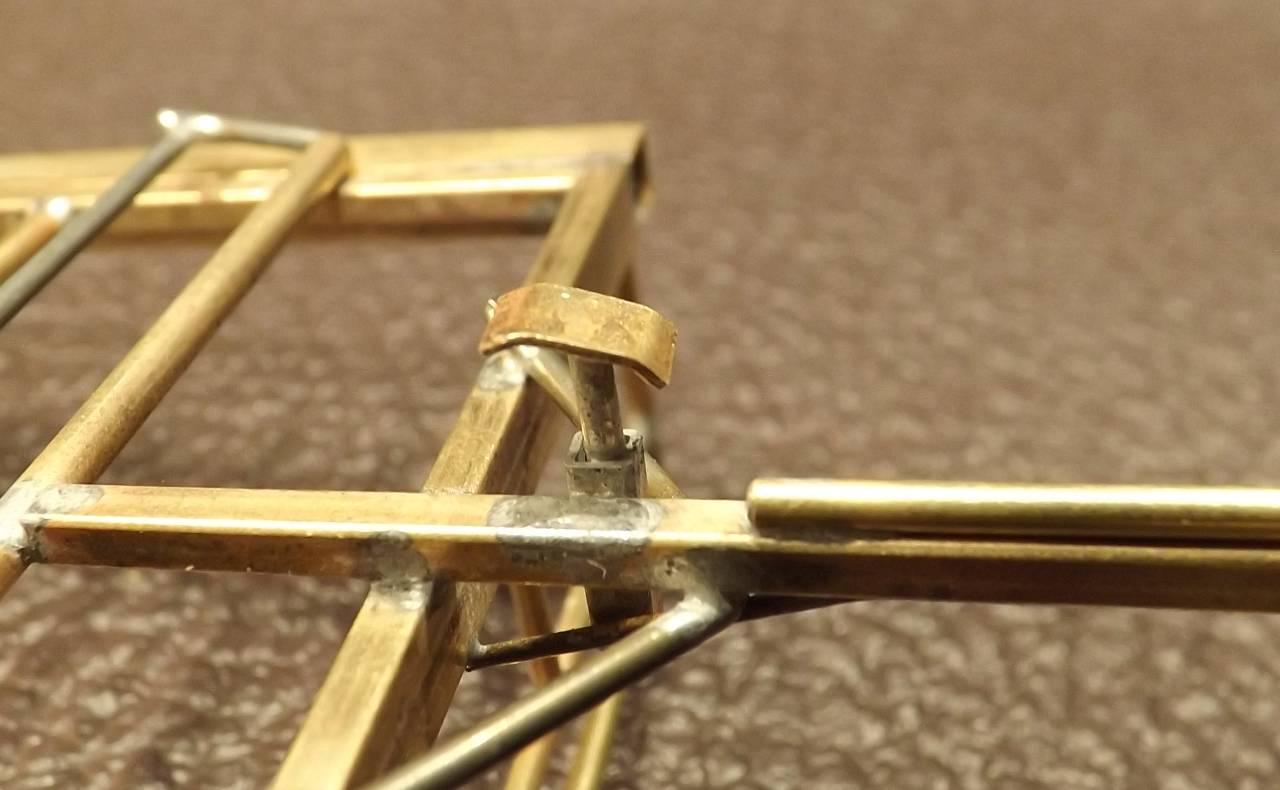
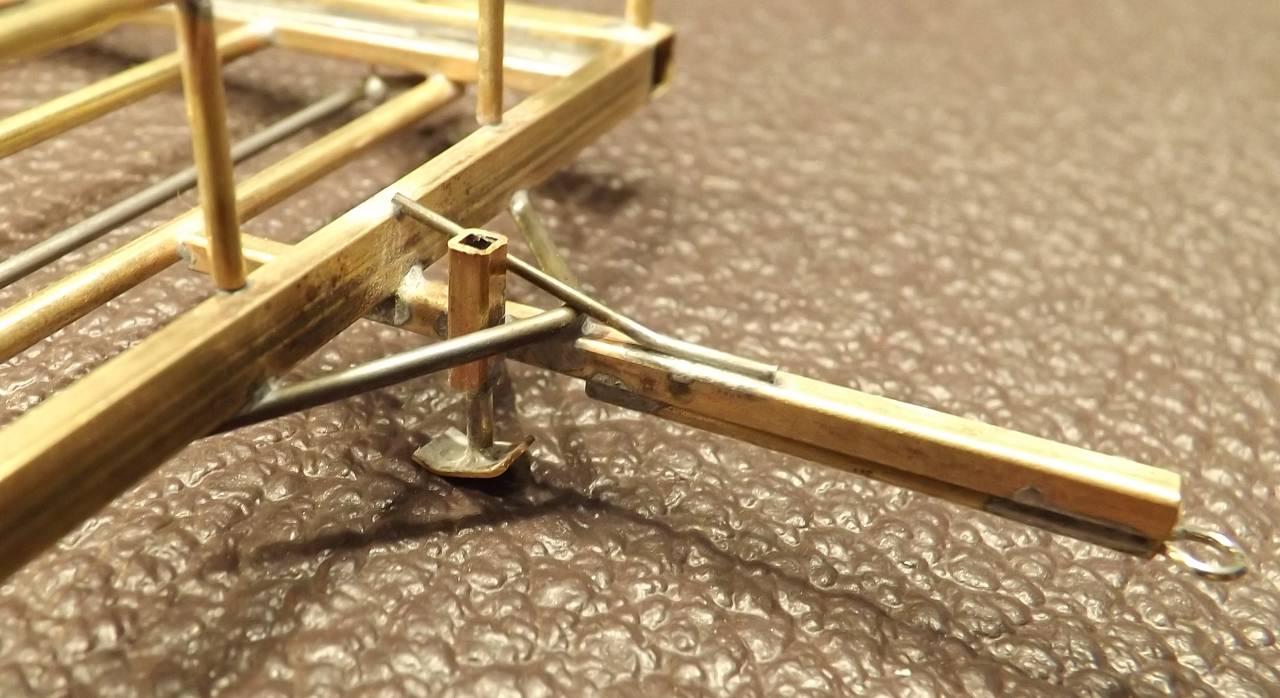
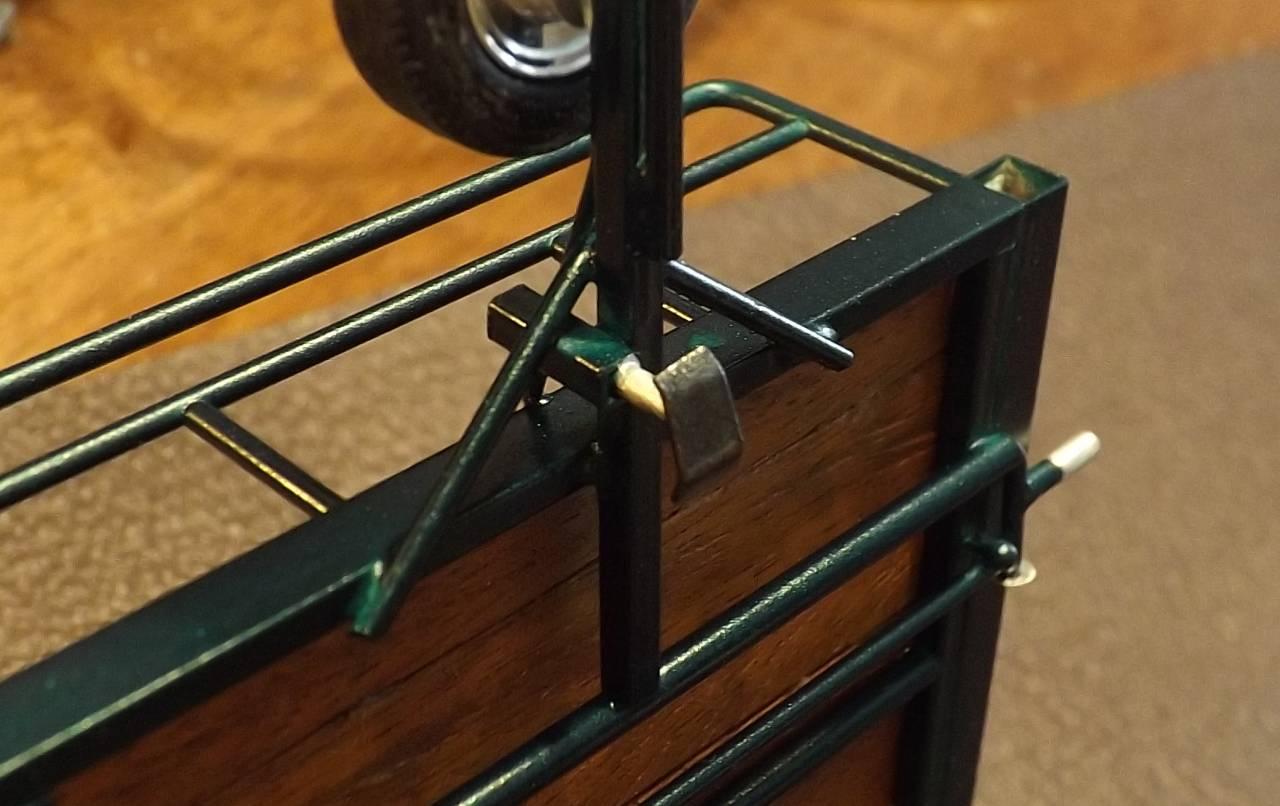
I opted to fabricate a pair of support legs underneath the front of the frame which could be lowered to support the trailer when parked or raised out of the way when hitched. To keep this 5th wheel rotating assembly raised up and out of the way I drilled a tiny hole and soldered a shortened ball point pin to function as a clip. This rotating assembly could therefore be ‘snapped’ into an upright position which would stay put.
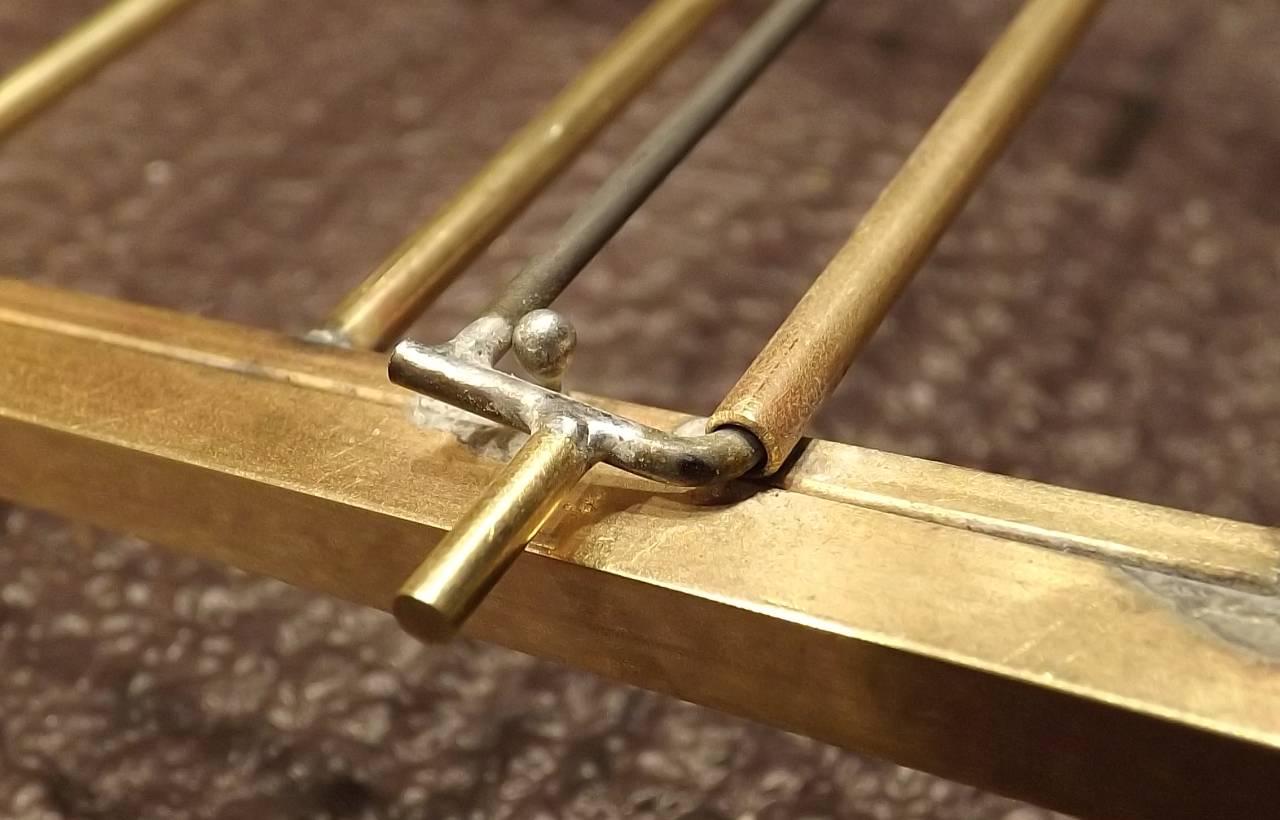
Tongue braces were added and then after measuring the height of the hitch a long 1/16” brass tube was soldered underneath the tongue into which the ring would be fixed. I also soldered another stationary 5th wheel detail piece to the side of the tongue, complete with skid plate.
The completed trailer frame was then scrubbed clean using a bathtub cleanser to neutralize the acid flux residue. After everything was rinsed and dried I used 5 minute epoxy to fix the ring in place.
Next I assembled the wheels and 1/16” brass tube axle then tested the contraption on track. What a joy! The balance was perfect. Together the van and trailer handled superbly around the circuit. Tight hairpins were never an issue for the independently spinning wheels/single axle setup and even at unrealistically high speeds the tandem stayed put.
So without the need for adjustment to the axle or fenders it was on to paint. After priming the trailer with Tamiya Fine I decided to use Dupli-Color Deep Jewel Green for the finish. Three light but even coats would do the trick.
As for the wheels, I opted to go for a chrome like finish. Since the inserts had kidney shaped openings I hand painted the centre of the wheels flat black and left the rest of each wheel unpainted. The inserts were primed then sprayed with two coats of Krylon Chrome Finish. I added detail to the centre of the insert/hub using an assortment of Tamiya Acrylics and later finished the centre of each knock off with a dab of the Molotow Liquid Chrome.
I also painted the 5th wheel details with more Tamiya Acrylics. The underside of the trailer would receive some basic leaf spring detail which I glued into place using more clear epoxy.

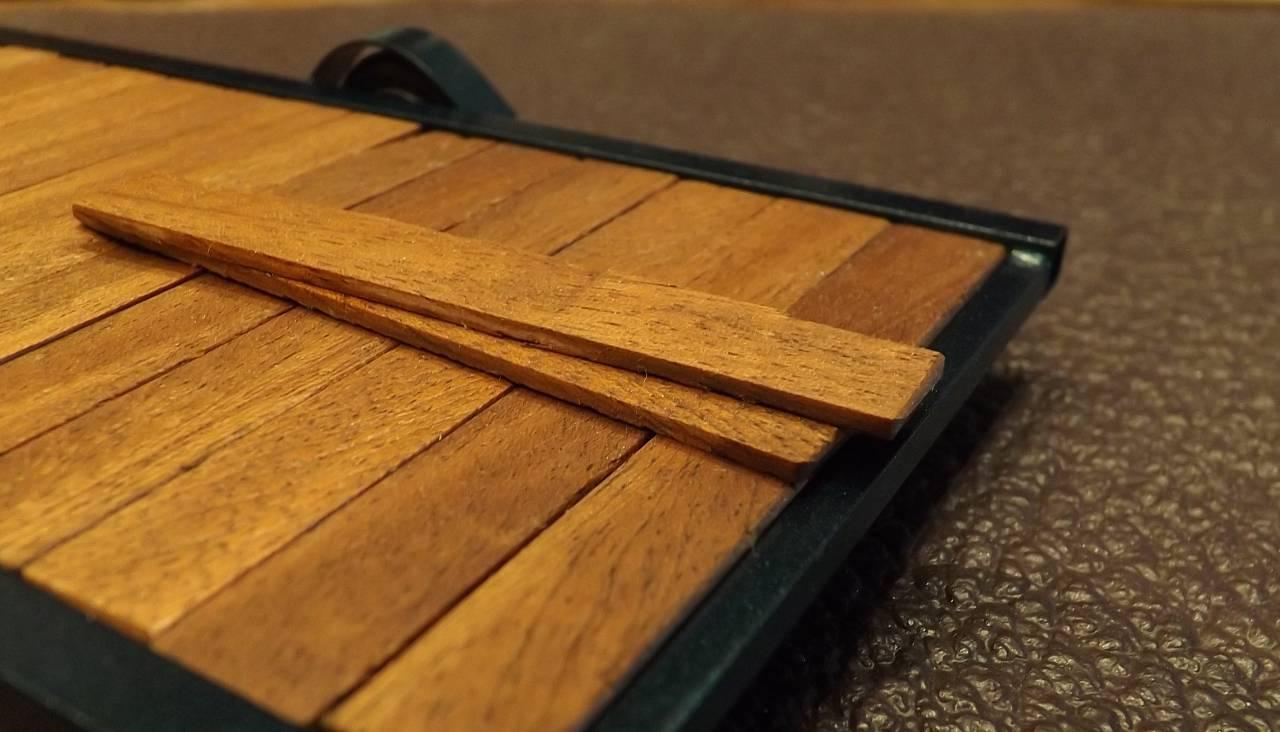
The lumber was ripped and then cut into equal board lengths to fit across the width of the trailer bed. I also sized and cut small pieces to use at the rear of the bed – allowing a liberal sized gap for any guide [models would all face the back of the trailer]. Extra boards were cut which could be used for ramps. After sanding each board was stained with Minwax wood stain, the excess rubbed off and the planks set aside to dry.
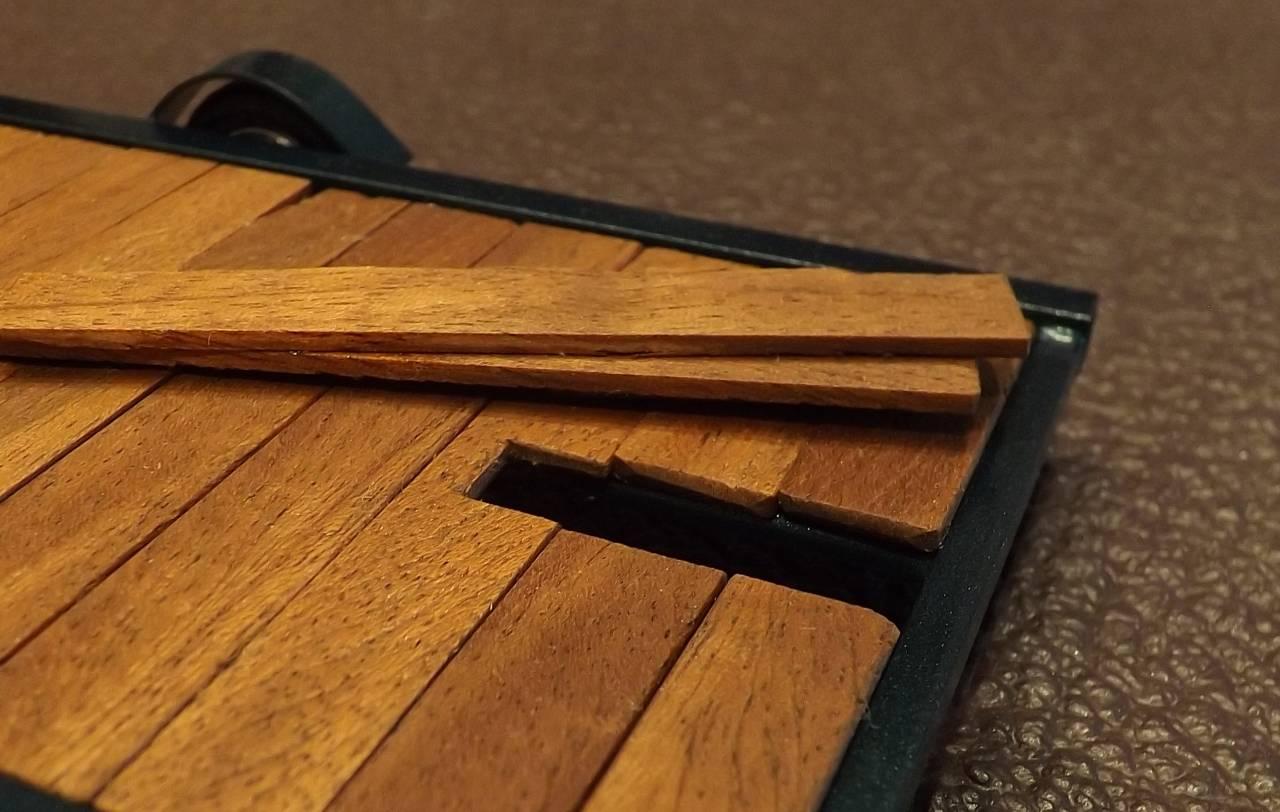
The lumber was carefully glued in place using more clear epoxy. Two boards which could be used as ramps together with a third smaller piece sized to fall into the guide space were all glued together. The purpose of the smaller piece was to keep the stacked ramps from sliding around during cornering. These could be placed on top of the bed to hide the guide slot whenever the trailer was bare.
Finally, the third wheel was fixed to the top of the tongue using more clear epoxy.
Cheers!… :good:
The Happy Canadian Scale Modeler!
